|
|
Post by polishbrigade12 on Mar 7, 2023 22:19:20 GMT -5
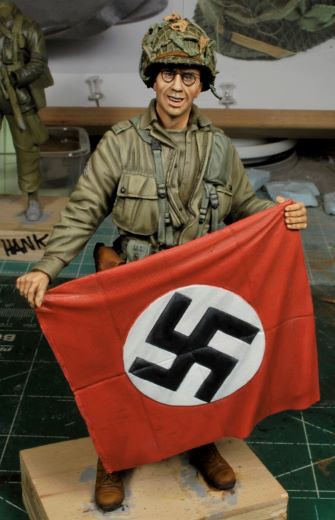
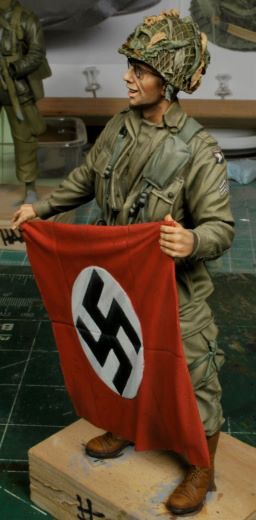
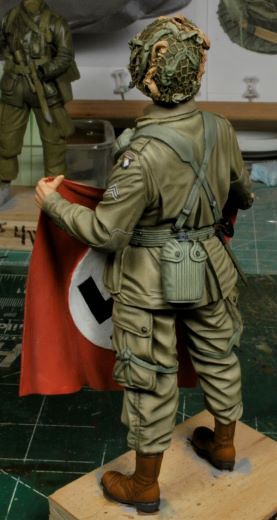
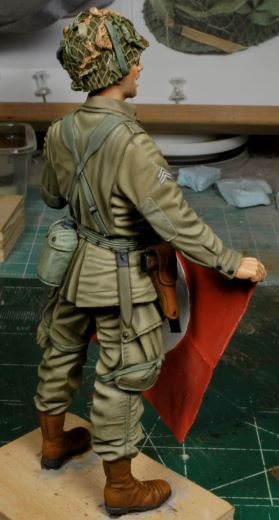
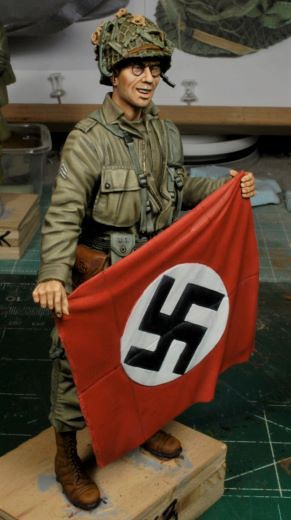
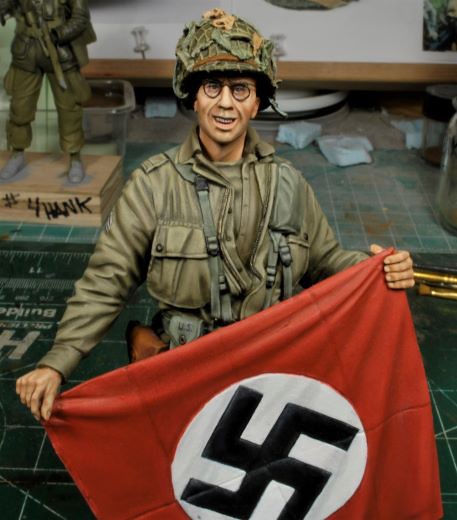
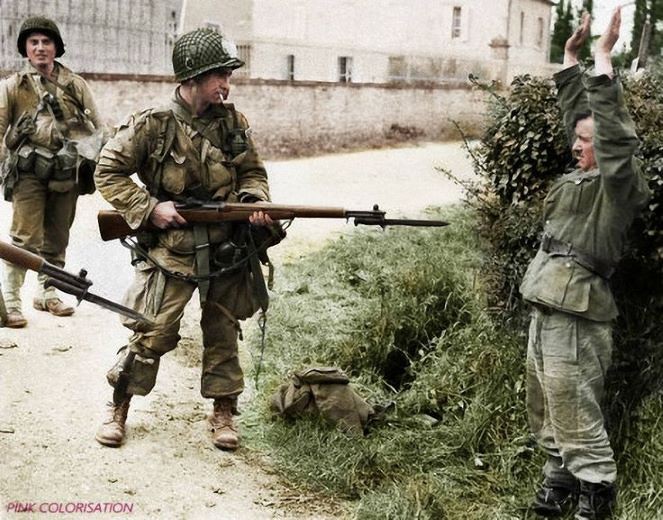
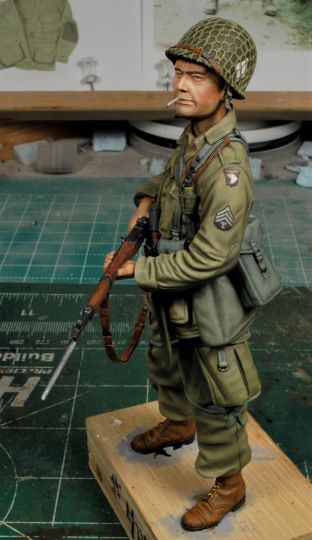
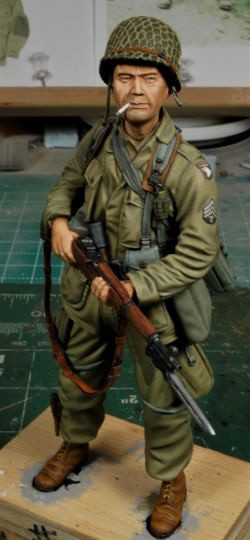
120mm Figures Sculpted by Maurice Corry, offered by Mitches Military Models. Back in the warm waters of Olive Drab and Khaki tones, after the “Battle of the Tartans”, I pulled from my stash a really great couple of figures that have been itching to be worked. Initially there would have been a total of eight figures in this dio, but I scaled it back for lack of space when completed. My curio cabinet is getting full. In this build there will be four 120 mm, Maurice Corry figures and a Freedom Model Kits 1/16th German Sd.kfz.2 Kettenkraftrad Typ HK 101. Starting off with some really great poses from Maurice Corry’s Airborne figure sets I couldn’t pass up this pair representing the iconic photo of the 101st AB in Normandy holding the Nazi flag. There are two represented from that famous photo and two others, A GI holding a German prisoner at bayonet point. The initial set from that iconic photo doesn’t appear to be available anymore, but the second set is still shown on the second page as available, 120mm Us Airborne Private with German POW. www.mitchesmilitarymodels.co.uk/120mm-models?page=2The Freedom Model Kits 1/16th German Sd.kfz.2 Kettenkraftrad Typ HK 101 is still available and is reasonably priced for this kit, IHMO. It even comes with a driver, not bad. Now I know some of you are going to mention that 120mm and 1/16th scales don’t mix. True, but it’s all in the presentation, right? So, I will work with a little optical illusion when placing that Sd.kfz.2. I haven’t quite figured out the scenario just yet, but there will be some small structure and lots of rubble within the scene. Point being, I need to keep my figure work going and these figures were in the cue. These four resin figures themselves have some really great usable poses which makes for so many possibilities in dio placement. Clean-up was pretty much as per usual, nothing too far out of the ordinary, the casting was good. I did have to make a few minor alterations, some of the parts weren’t fitting as well as they should have, but nothing drastic. The rifle straps were made from sheet pewter and some copper wire for the lugs, and a few other parts. I also made a pair of glasses for the GI with the flag. They appear a bit on the thick side, so I may scour for a bit thinner wire, but that will be towards the end of the build. Lastly, the figures were given a primer coat of Floquil Primer, oil based, to help identify any areas missed and prep for the base tone color application. Freedom Model Kits 1/16th German Sd.kfz.2 Kettenkraftrad Typ HK 101 is now in production and is available from several vendors. This is a decent kit so far and it appears to be going together nicely. This blog will not feature the Sd.kfz.2 build, per se, but is mainly about the Airborne figures and painting them. I will update the progress, but not with any SBS on this rig. 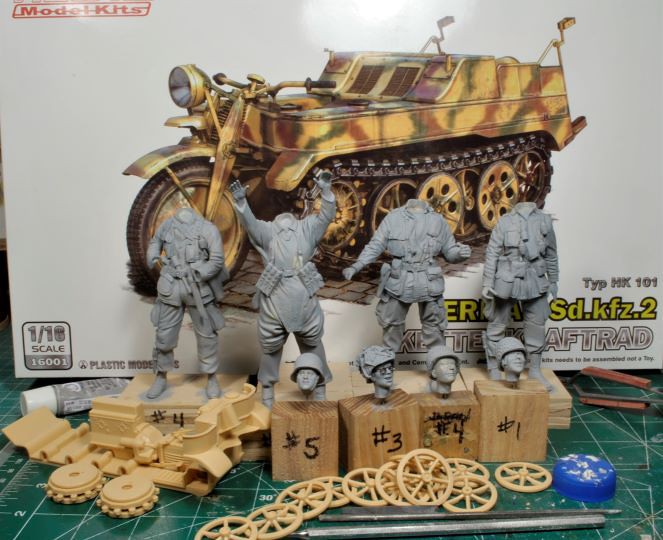 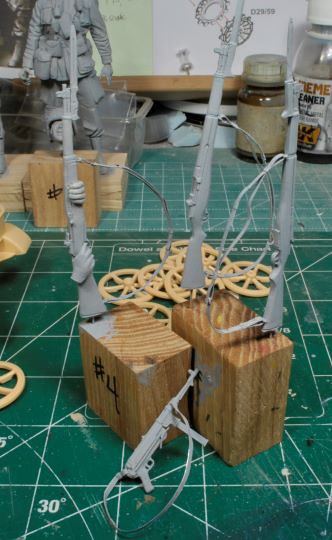 More to follow soon, the Sd has to be done before the figure work begins at full speed. Thanks for watching. Cheers, Ski. |
|
|
|
Post by polishbrigade12 on Mar 7, 2023 22:20:27 GMT -5
Loo, Kybo, Camode, PrivyOr is it just an outhouse? There are many names for taking care of business, but I’m calling this an “outhouse”. This little insignificant addition should bring the scenario to life and help tell the story. A very simple build using ½”x1/16” strips of pine milled on the band saw, plus a few other square strips of various dimensions. The hardware was made form sheet copper with copper wire for hinge pins and sewing pins were cut to size for attachment bolts. This took only a few days to knock out and was a nice diversion. 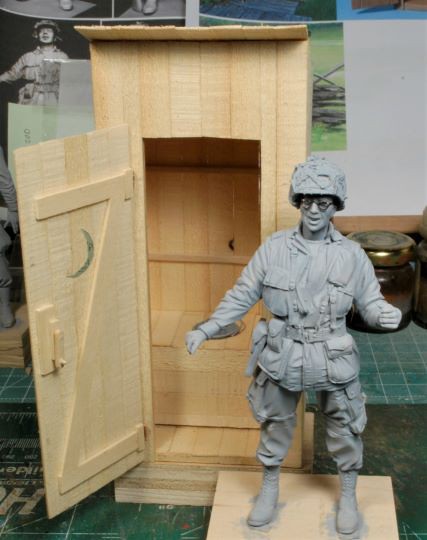 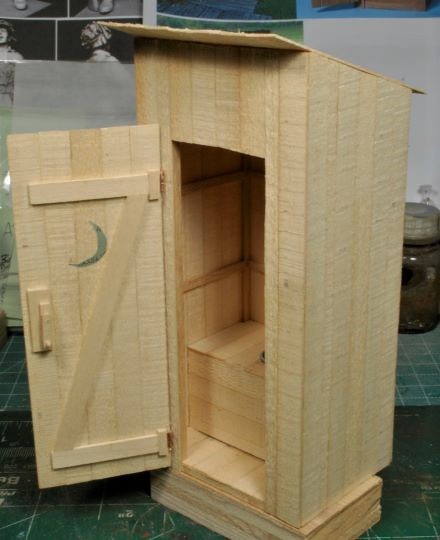 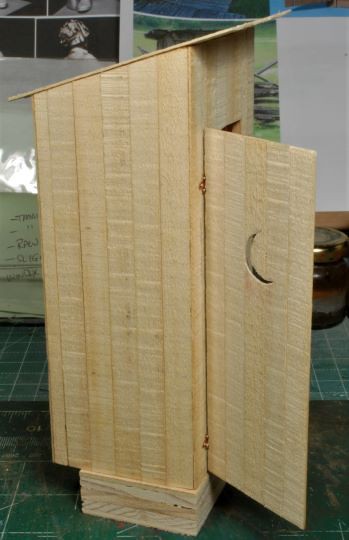 I made the potty bucket from sheet pewter and copper wire. Just a simple design since it won’t be seen up close. 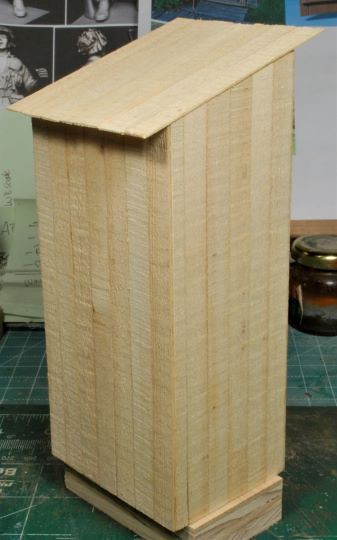 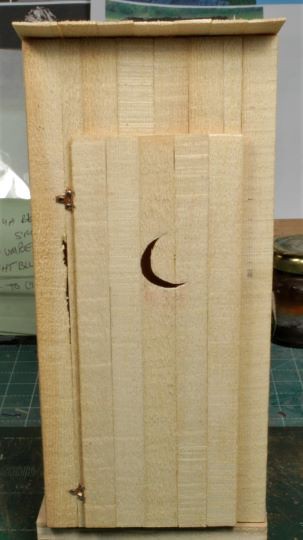 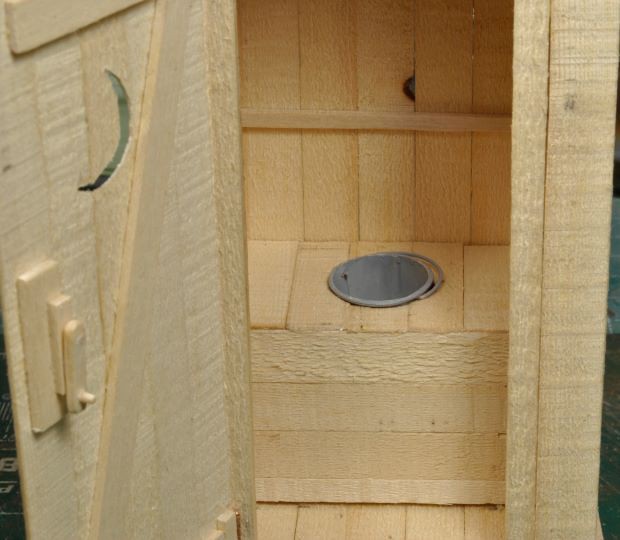 After the structure was complete, I gave the entire build a wash of Burnt Sienna with a touch of Cadmium Orange oils. I coated all over, inside and out, to make sure the base tone was visible throughout. Next began the sun beat worn effect using Burnt Umber and Raw Sienna with Mig’s pigments, white or light tones only. Several Burnt Umber tinted washes were applied to slowly bring out a sun beat dusty appearance. I had never done wood weathering with pigments in the past and found this method very simple with great results. It will now be a standard for my tool box of techniques. 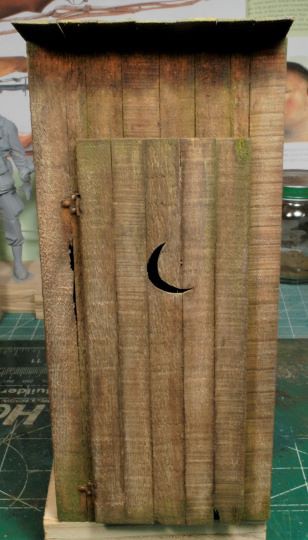 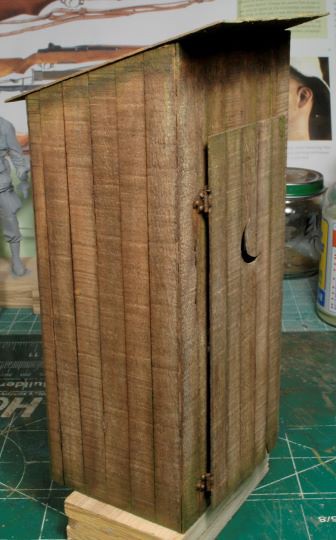 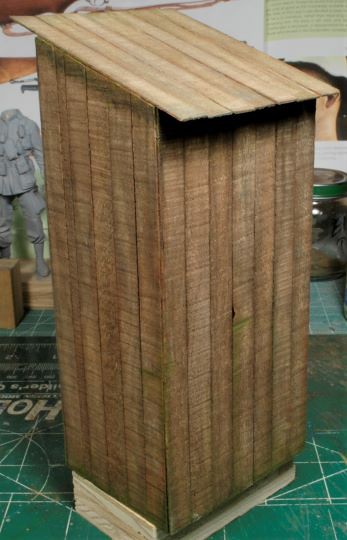 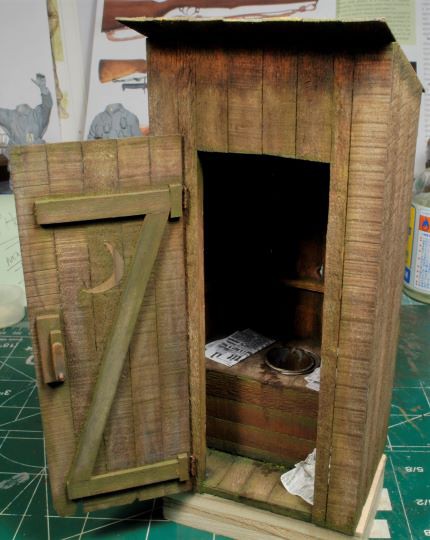 Since this outhouse is intended to appear well used and having been in service for some time, I had to beat it up just a little, but not too much. I also wanted to bring out the weathering often found in wetter climates such as areas in Northern France. I tried to not overdo it, but I think this will work out just fine. Mig’s Slimy Grime Light and Dark came in handy for the subtle mold and mossing effects. No outhouse would be complete without a few newspapers inside, not only for reading material, but for taking care of business. Reading material was printed from photos of WWII French newspapers found on line. 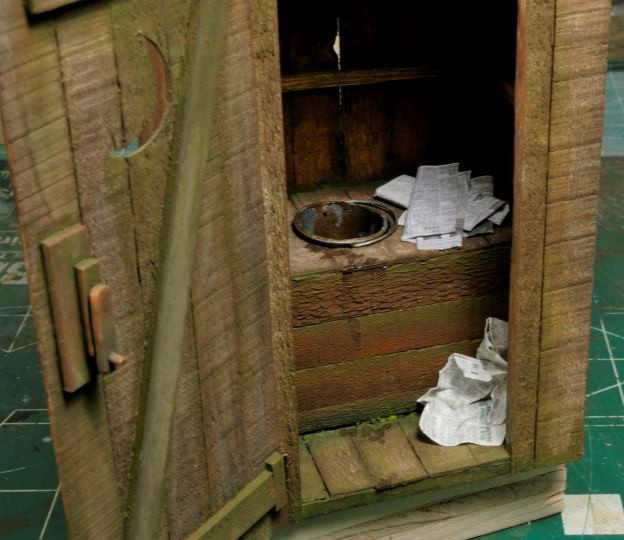 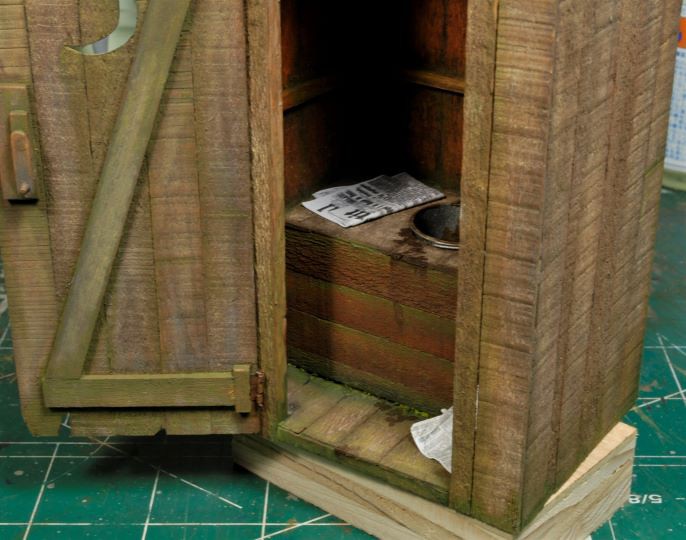 Once the outhouse is attached to the base, I will add boot prints and a bit more dusting, but for now, it will be set aside awaiting final installation. Thanks for watchin. Cheers, Ski.
|
|
|
|
Post by polishbrigade12 on Mar 7, 2023 22:21:05 GMT -5
OPR, Oil Paint RenderingThis trac-bike has been on the bench for a few weeks now getting a work over. I won’t go into too much detail on this portion of the dio, but just a minor update on progress. The real issue with this kit is the forks and the tracks, they are weak, IMHO. No worries, the worst is past, now the fun part, painting and weathering. Using Mike Rinaldi’s “Tank Art” book series I am stepping away from the traditional weathering approach and trying something new, or at least to me it is. Oil Paint Rendering, or OPR for short, which is very thoroughly explained in book #4, German Armor. The SBS sequence is located at the end of chapter in each book for quick reference making for a pretty slick arrangement of the steps to follow. Being an oiler at figure painting already, this OPR method is right up my alley. This really is a simple process, but it just takes a bit of practice, like everything else in this “Sport”. I picked up the first four books a few years back, so now I’m ready to give it a go and see if I can incorporate this OPR method to its fullest. Kudos to Mike for such a well written and illustrated set of what I would consider essential volumes for armor geeks. Mike’s books can be found here: www.rinaldistudiopress.com/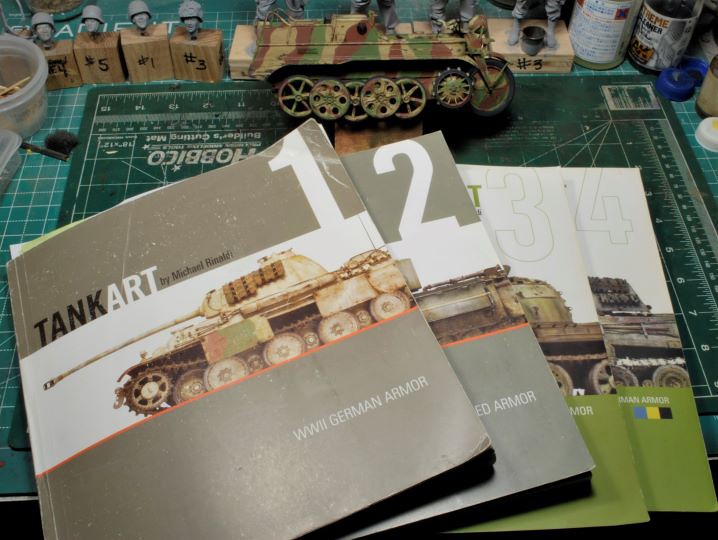 Off we go,……….. This current camo pattern is not exactly accurate, but close enough for my purposes. My airbrush talents are lacking, so a true hand sprayed on pattern would have been a dismal disaster. I’ll run with this one and carry on. I did use elastic masking putty from AK Interactive. This stuff is great, my first time using it, but it’s rather tricky in tight spaces or on delicate details, so be aware of that if you’ve never used it. I also used the hairspray method for the chipping sequence. I still have a long way to go to feel comfortable with this method, but the possibilities are incredible. The biggest issue being “less is more” when it comes to chipping. It’s too easy to get carried away with the process and trash all that prior work only to end up with a redo. 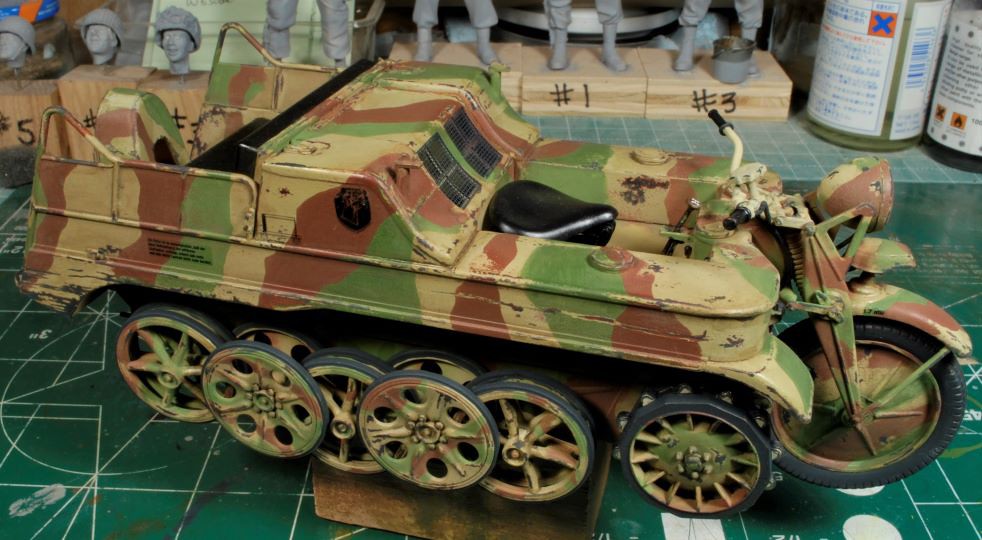 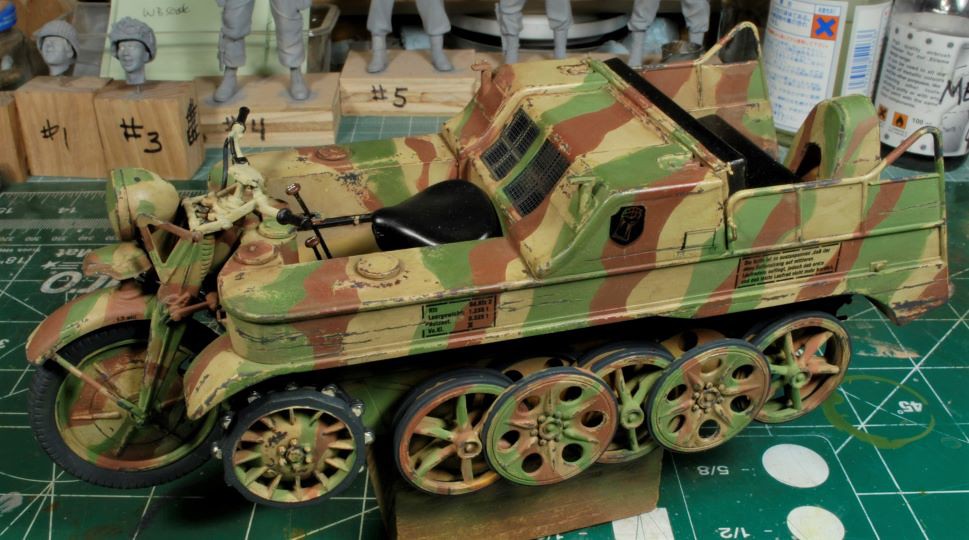 So, as you can see there has been appreciable progress, but’s it’s slow going, especially learning a new technique and not wanting to jack it up, lol. I will use some pigments for mud work, but not much. I want to blend and fade using the oils and get the rust and dirt streaks down correctly. I’ll post the end results when it’s finished, but remember, I’m working to get to the AB figures, this is just a necessary next step to reach that goal. Thanks for watchin. Cheers, Ski.
|
|
|
|
Post by polishbrigade12 on Mar 7, 2023 22:21:46 GMT -5
Trackin it Now!The Trak-bike has been completed, finally. Ok, for the technically inclined, it’s really a German Sd.kfz.2 Kettenkraftrad Typ HK 101. That’s a mouthful, so it shall henceforth be referred to as a “Trak-bike” for purposes of this article. Note: As mentioned before, these tracks for this kit are pathetic and have a real tendency to break at the most inopportune time, while being installed. I painted, weathered, and left the sprockets uninstalled, so I could install the tracks over the sprockets, place the back end of the link over the rear running wheel, and carefully slip the sprocket into place. HA, ya right, they still broke. I had to “pin” each side in at least one link to keep these buggers from coming apart during installation. The design team gets a “swift kick in the pants” for that brain dead maneuver, IMHO! Ok, onward. After using Mike Rinaldi’s “Oil Paint Rendering”, or OPR, I was decently happy with the results. This was, after all, my first attempt at weathering a vehicle using oils only,………..well almost. I did use Mig’s pigments to add a bit of mud crusty above the running gear and I also used a mix of pigments to form a Euro-earth tone and added thinner to splatter a bit on the rig lower sections. All in all, I do like the OPR method and will be using this quite a bit from here on out. Like I said before, I’m an oiler anyway, so what’s the big deal, right? 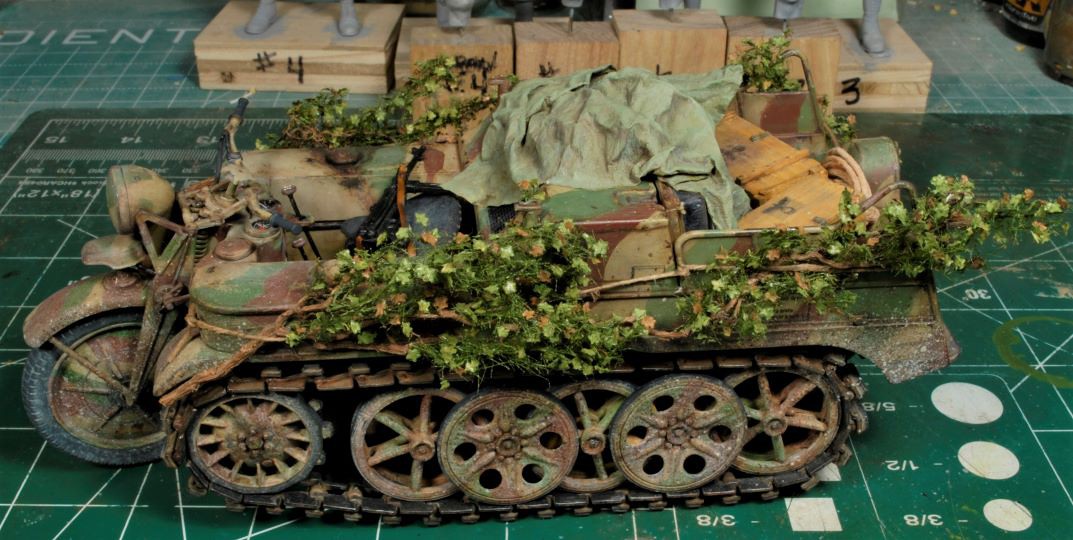 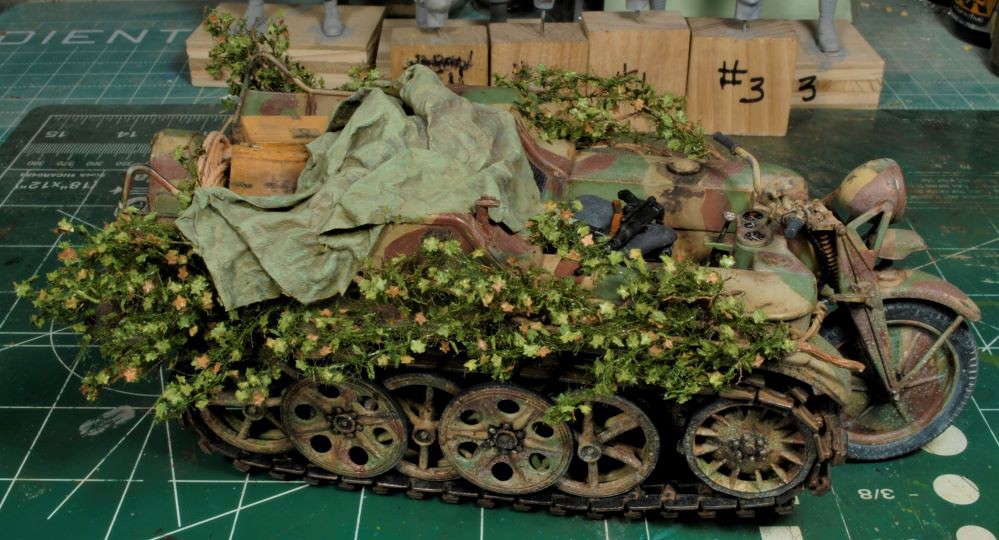 As you can see from the photos, I added some foliage using MiniNatur Plant tree foliage from Germany, to add interest and help support the story line. This stuff is great and I now need to replenish my stock, it’s very handy. I also made a few crates and some rope for the back end of the trak-bike as well as a cover tarp that has been drawn over by some of our characters. More on that later. 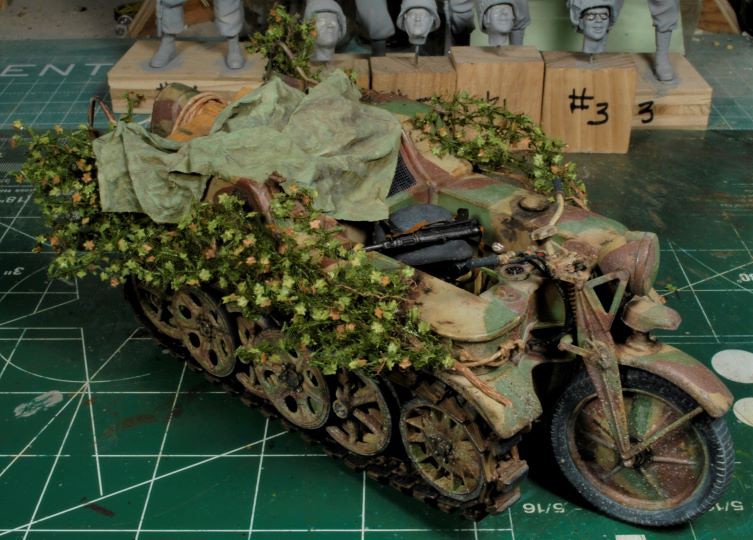 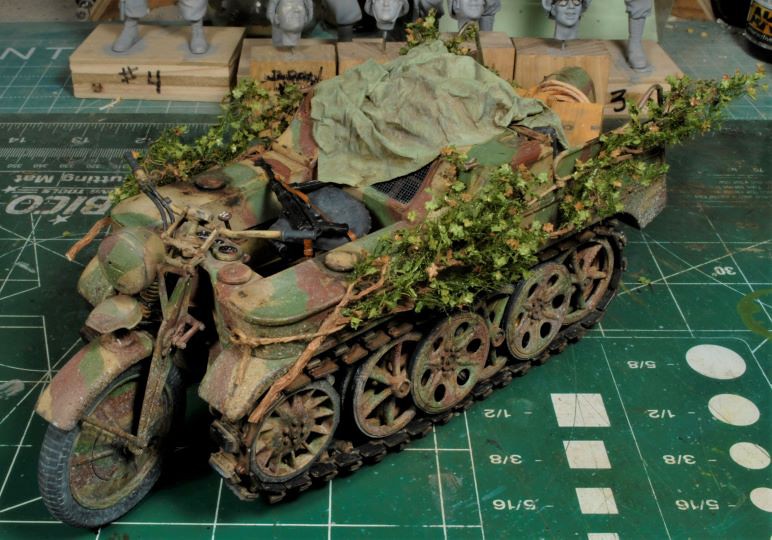 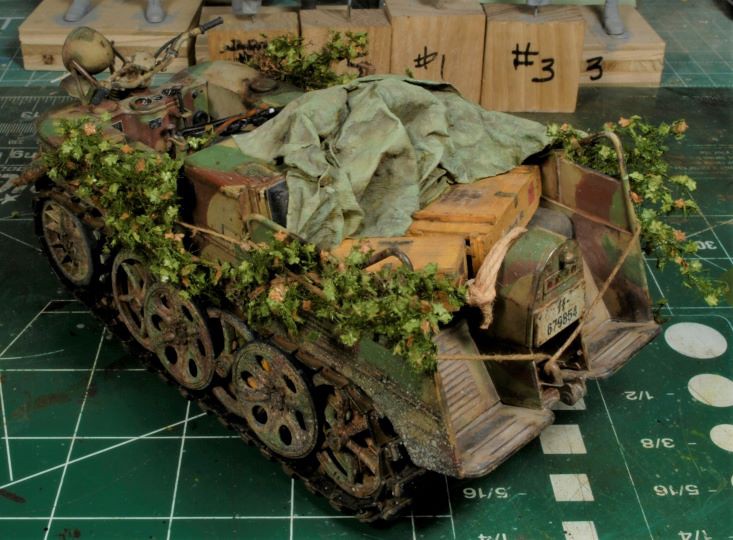 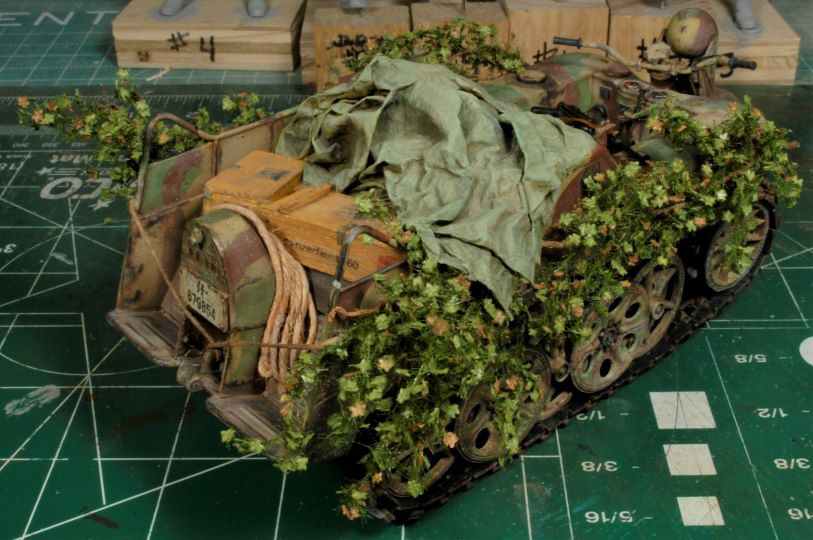 It might seem a bit odd having that MP40 sitting on the driver’s seat, but that will become obvious later, HA! I’m really not going to give up the story line just yet, but I’m sure there a few that have already figured this out. 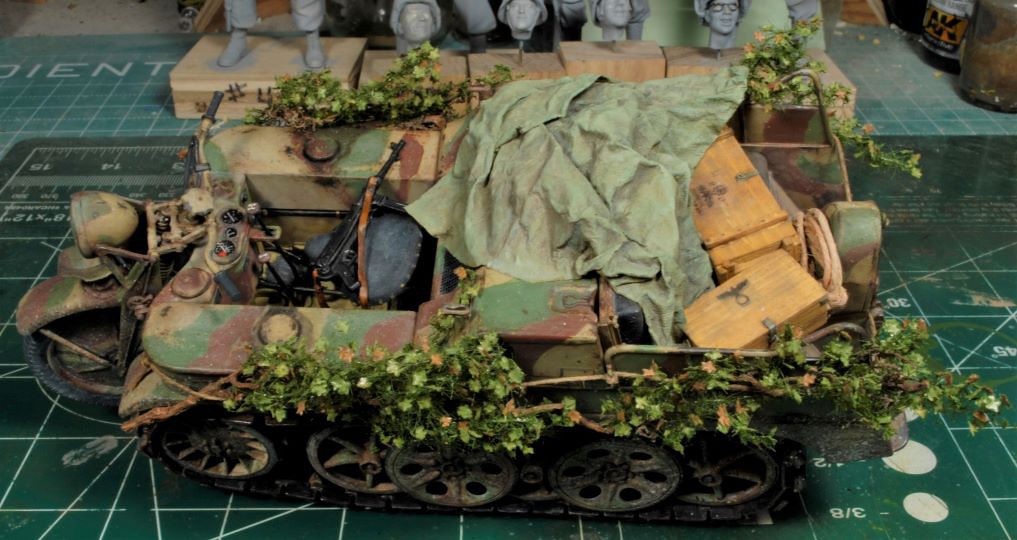 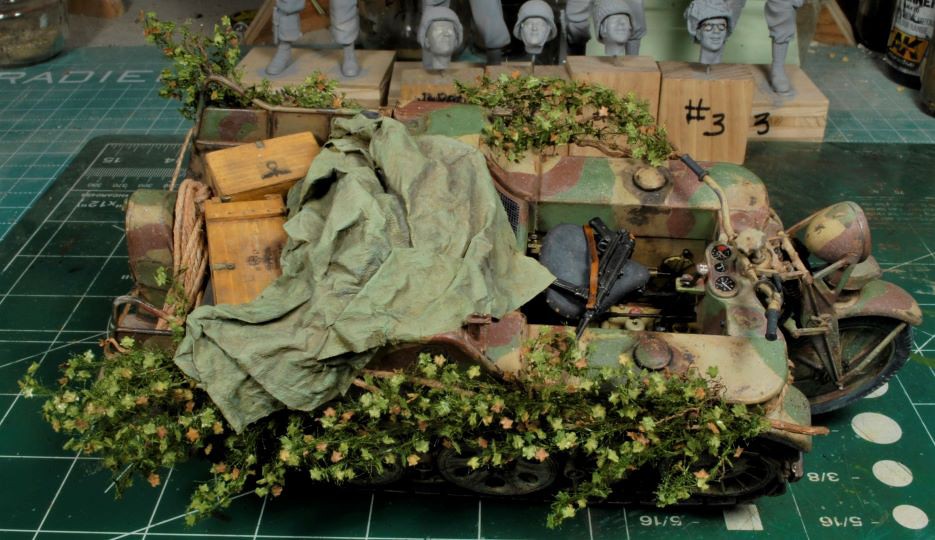 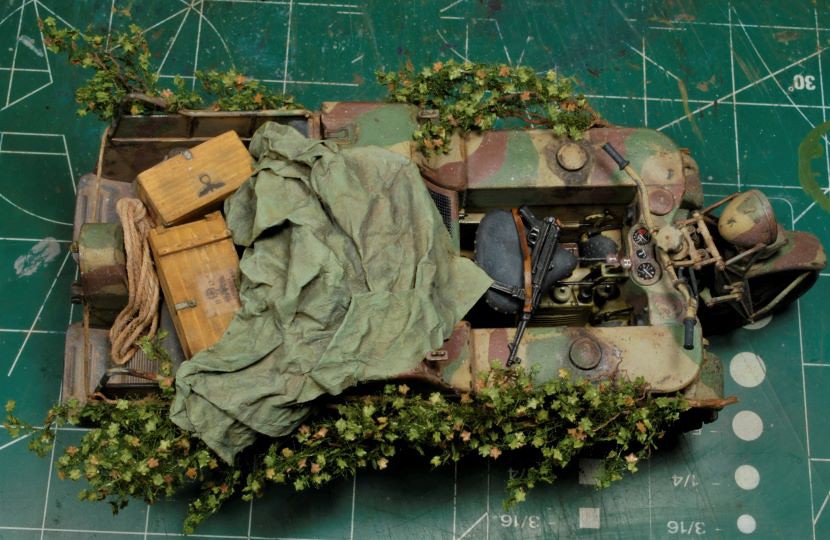 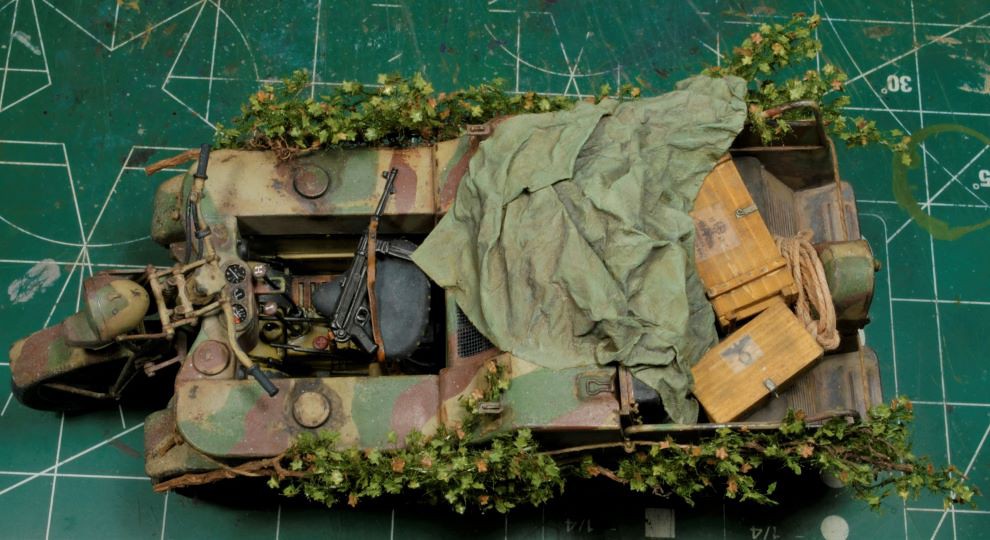 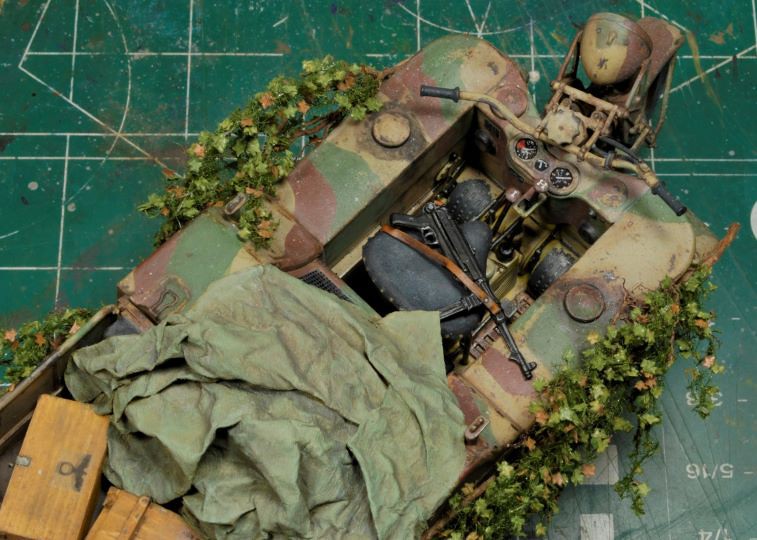 Now that this trak-bike has been finished it will sit safely in the curio cabinet until the final dio placement. Next up, changing gears and painting faces, Yehaaaa! Thanks for watchin. Cheers, Ski.
|
|
|
|
Post by polishbrigade12 on Mar 7, 2023 22:22:17 GMT -5
Let’s Face It, again,…….Finally, I’m back to painting the faces, my favorite part, because I have so much to learn. So much so that I’ve already given #4 a wash down at least three times. As some of you may remember, this happens pretty much every time I get back to painting faces. I recon a more analytical approach might help my process. The fact that I was rushing the process might have something to do with it, too. That was a Bozo No-no. So, I let go and let it happen, so far so good. Here's the line-up, but as you can see the fella in the back left has some serious eye issues that will need to be addressed before he gets a brush put to him. I was not impressed with this goofy overexaggerated face, but I’ll work with it as best as I can. A little scraping and putty work should bring him in line with the rest. 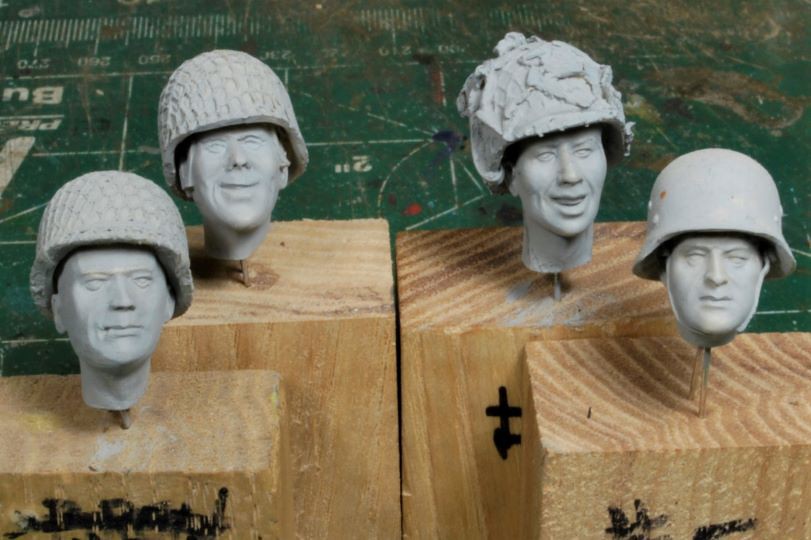 There is still quite a bit of work to be done to #4, but the basic tones are on and now some of the detail will be worked as soon as I get a hard dry on the oils. #3 has a very basic oil placement on him now, but he’s a long way behind #4. 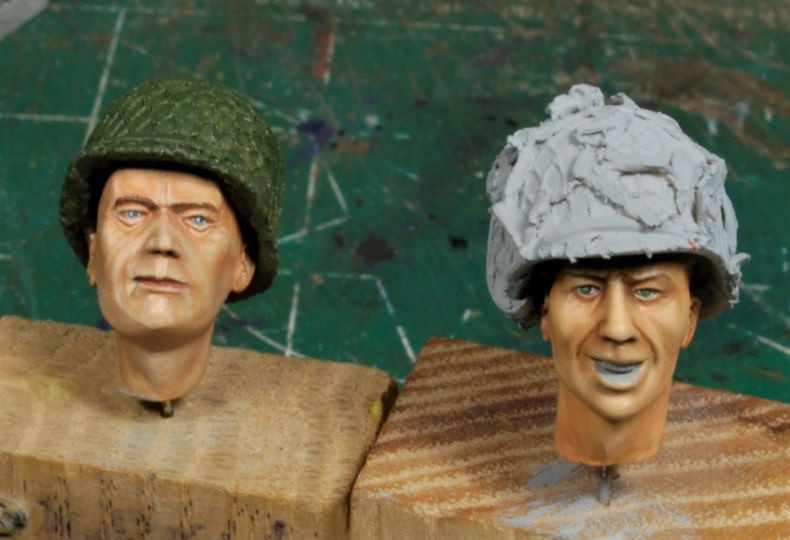 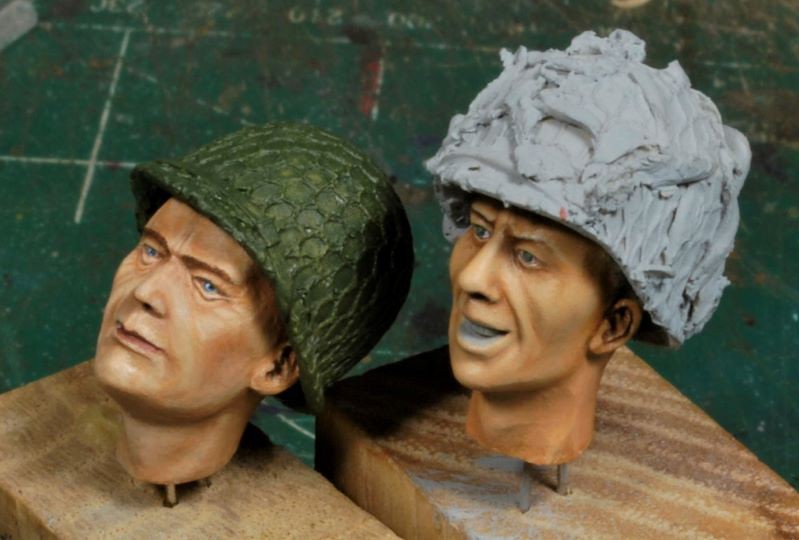 Now that I’m happy with the eyes and the basic overall color tones I will work in the more defined shadows and highlights. I like to snap a few pics and scrutinize the faces on the computer where I can see just how they will appear once posted online. I already see areas of concern and they will be addressed soon enough. I will also be using some of Mike-the-Kiwi’s techniques from his recently released book. The facial textures are what I’d like to learn and there’s no better time than the present. Also, I recently heard an interview from Mental Dental, David Lane, so I will work on some oil feathering as well. If I jack it up, I’ll break out the oven cleaner and Ruck Onward, what else am I gonna do, right? 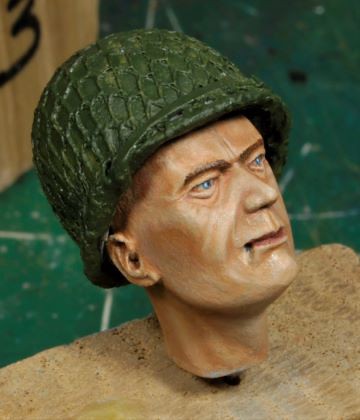 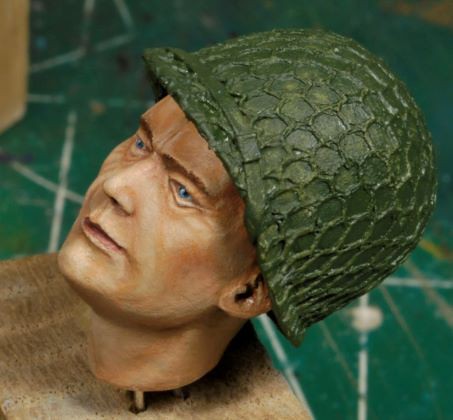 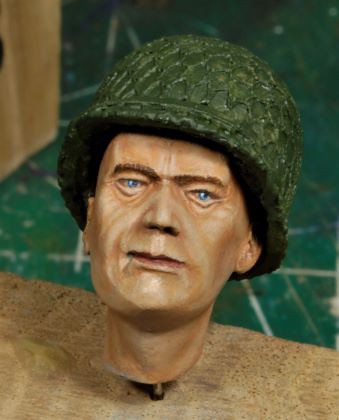 You may have noticed the skin tone on #4 is much lighter than #3, but that will change to a more compatible appearance. Not everybody is going to look the same anyway, but I don’t want #4 looking sickly, if ya know what I mean. I was able to knock out #3 much quicker, within an hour or so. See, once back in the groove things move much more smoothly, or kinda sorta? Thanks for watching. Cheers, Ski.
|
|
|
|
Post by polishbrigade12 on Mar 7, 2023 22:22:49 GMT -5
#3, Almost AcceptableAfter a day of adjusting skin tones and “feathering in” the oils I am satisfied with the results so far. This one is about 80% finished. I still need a bit more work before I set it aside to dry hard before working in some facial textures. 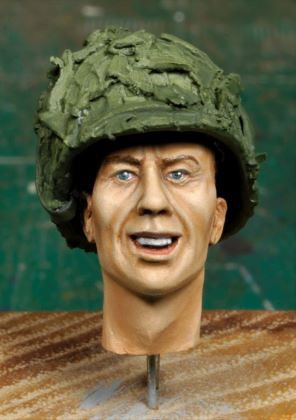 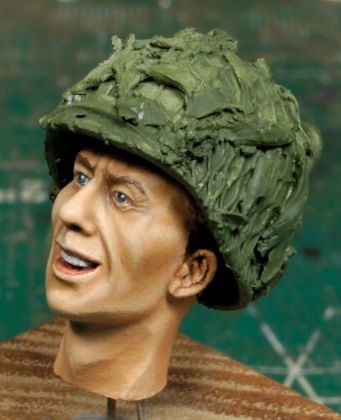 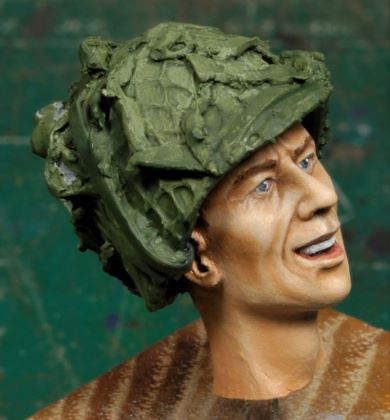 Time to get the last two heads up to speed and work the new techniques as a set. I may give all of them a dull coat to seal in the work so far. It’s always a dice roll when working in a new technique after getting this far, but I’m willing to take that chance. Thanks for watching. Cheers, Ski. P.S. Let me not forget the red tones as well. Sheesh, just caught that, lol.
|
|
|
|
Post by polishbrigade12 on Mar 7, 2023 22:23:14 GMT -5
Breaking the “Glasses” CeilingI know some us can get carried away with detail and some of us just move on, but when the detail in literally “in your face” ya kinda gotta pay attention, IMHO. The set of glasses for the young lad on the right were a royal baby rump kisser, to say the least. Now that I’ve done this at least 7-10 times, or more, I can pretty much knock out a pair in about 15mins, sheesh! This thin copper wire takes a delicate approach or the whole thing goes to pot in a heartbeat and any prior work is caput. 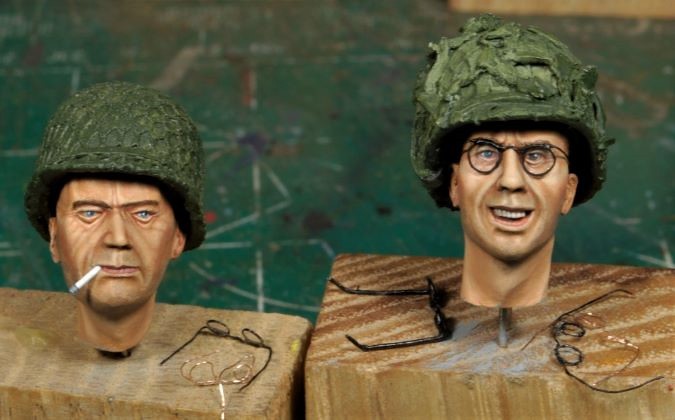 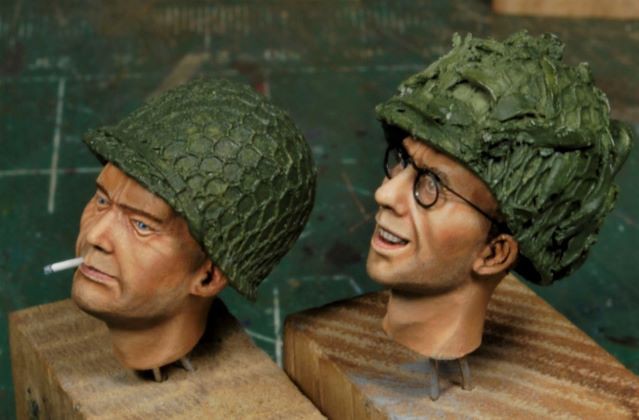 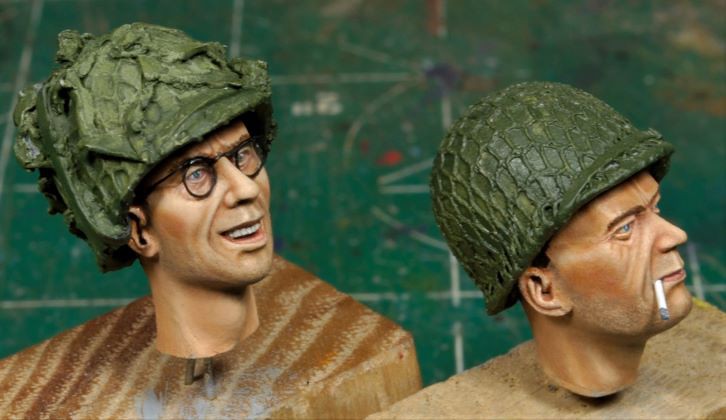 The lenses for these glasses were made from a plastic envelope that protected a set of decals in my stash. It was the only thing thin enough to work in this scale realistically. I did make an attempt at using liquid water from Vallejo, but boy howdy was he wearing coke bottle lenses then, woof! Ok, both heads shown are completed for now with most of the minor details already added. My attempt at adding in facial textures met with utter failure, so I will move on saving that technical approach for a 1/10th bust. There comes a time when you have to realize it just ain’t happenin, and move on. I will set these aside for now and finish the last two heads before I detail the helmets and move on to the bodies. 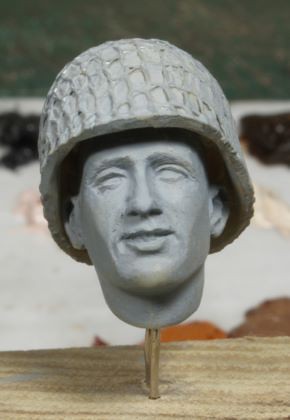 Yes, Goofy has been replaced by one of Steve Reedee’s 1/16th scale heads. This is a far cry from that ridiculous head that came with the figure. In a conversation I had earlier today regarding well sculpted heads, they pretty much paint themselves. I agree completely, but somebody still has to control the brush, HA! Thanks for watchin, more to follow shortly. Cheers, Ski.
|
|
|
|
Post by polishbrigade12 on Mar 7, 2023 22:23:54 GMT -5
Bart and BillyThe last two heads are in the final stages of completion, but still need some touch-up. Some may be wondering why name these guys. Well, as suggested by someone who paints a heck of a lot better than I, Mike-the-Kiwi said, “For me this association to real individuals helps create a creative connection deeper than just painting a resin figure.” I have to agree, and so far, I have been able to get past the “hump” on these faces. This is no different than full emersion when building a dio or a given scenario in the past, but I had never considered this concept when painting figures. Works great for me, I’m likin it! Thanks, Mike! So, for now, these two faces will set up for a few more days, then the final touches will be worked in. Teeth need to be defined, rosy cheeks need a tad more work, and the lips also. I will feather in any weak areas before I call these done. You may have noticed; Billy's face is from Steve Reedee's 120mm collection. Great work, Stevo! 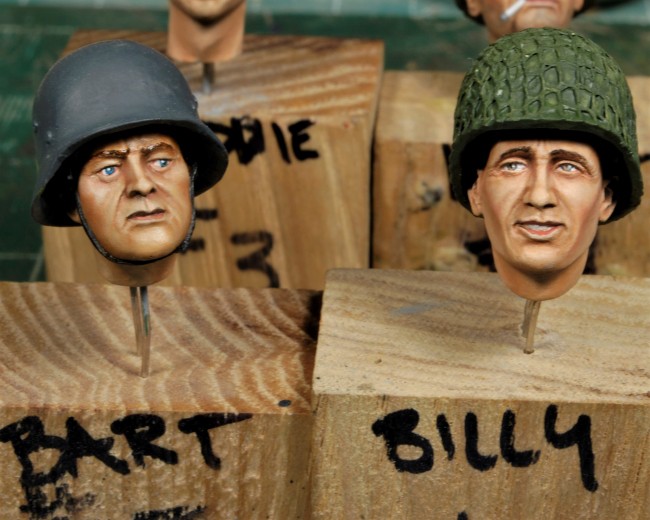 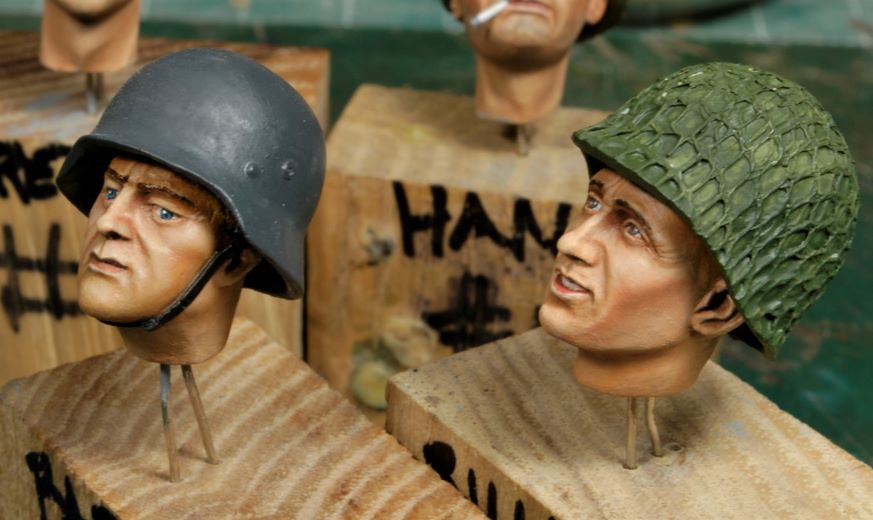 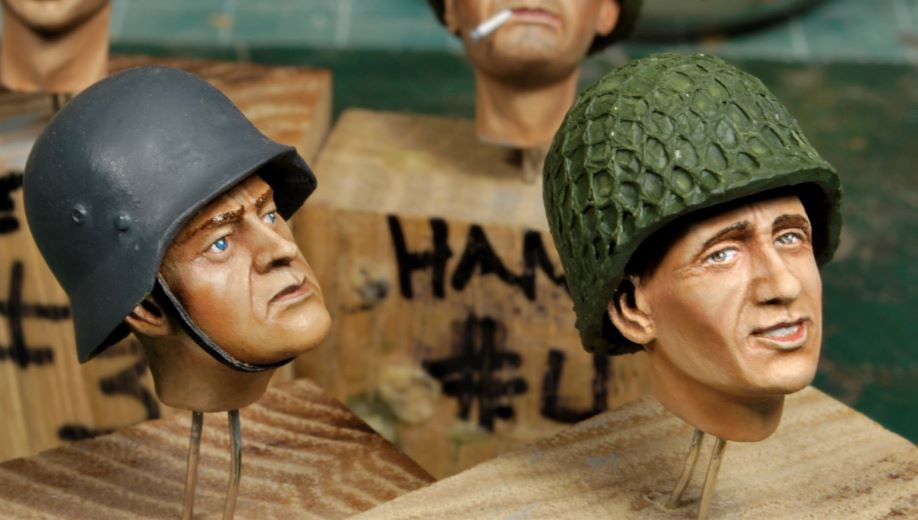 The AB figures and Bart have their initial acrylic base coats. Time to research all of the gear and weapons for the correct color tones, etc. The splinter pattern for Bart will be a challenge given his poncho is not just hanging down like most, it’s got a lot of exposed areas to paint. Well, I recon it ain’t as bad as a Dennison smock, HA! 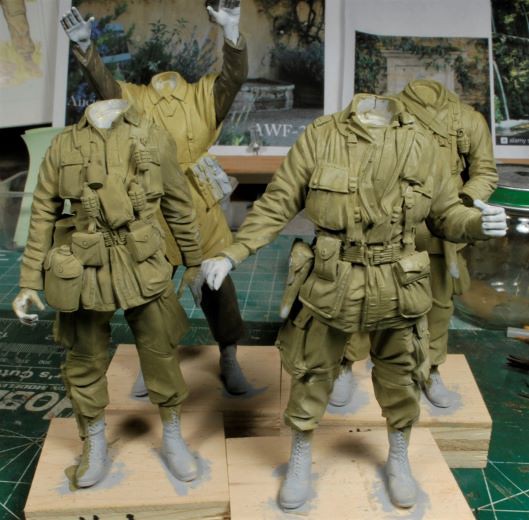 Thanks for watching, more to follow soon. Cheers, Ski. P.S. The official names for these characters are; Hank, Freddie, Billy, and Bart.
|
|
|
|
Post by polishbrigade12 on Mar 7, 2023 22:28:32 GMT -5
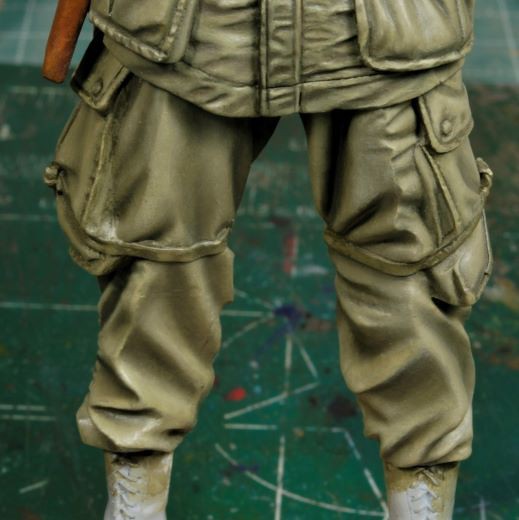
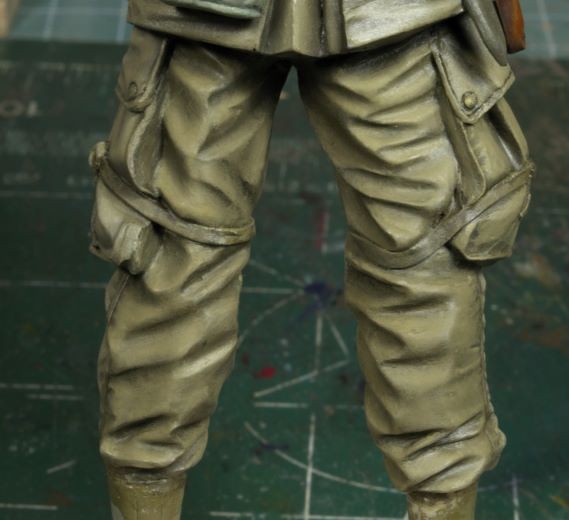
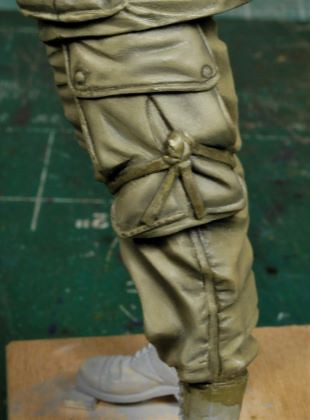
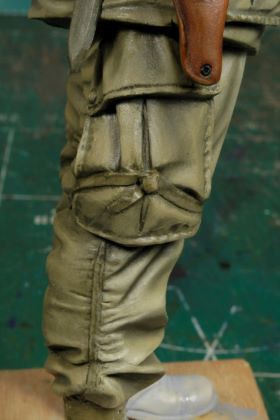
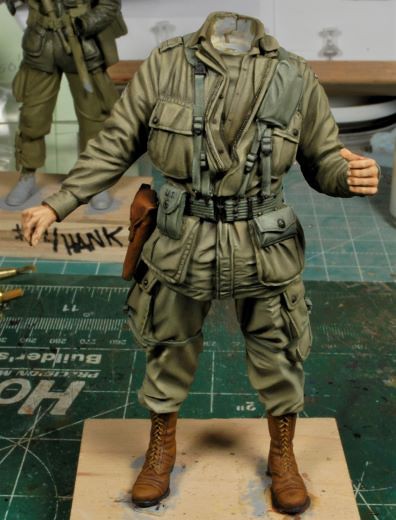
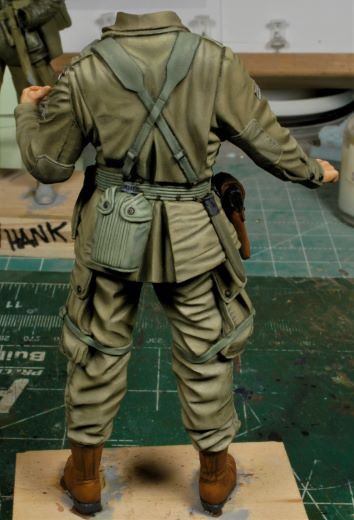
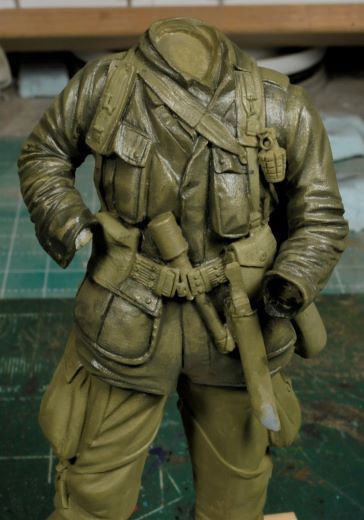
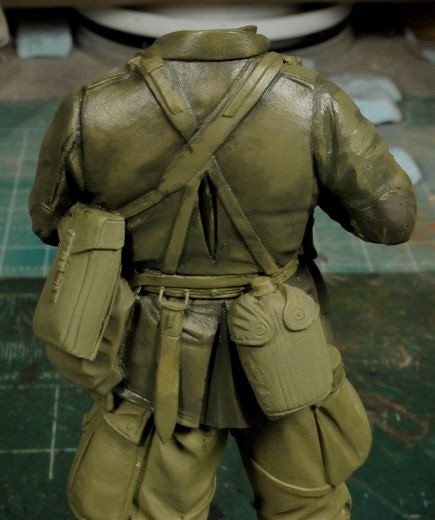
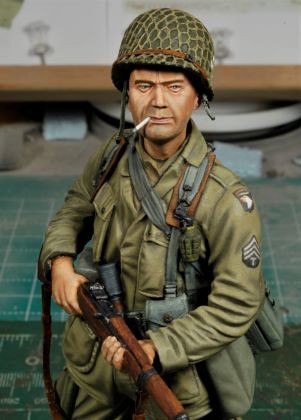
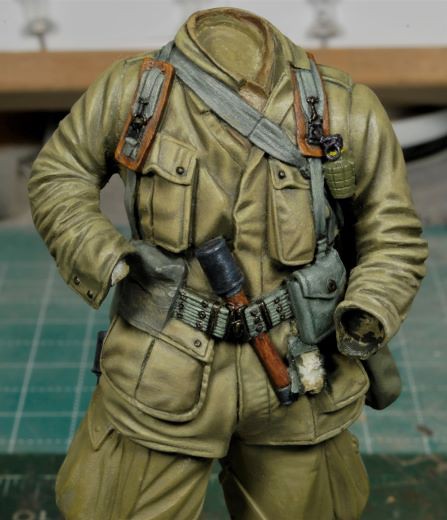
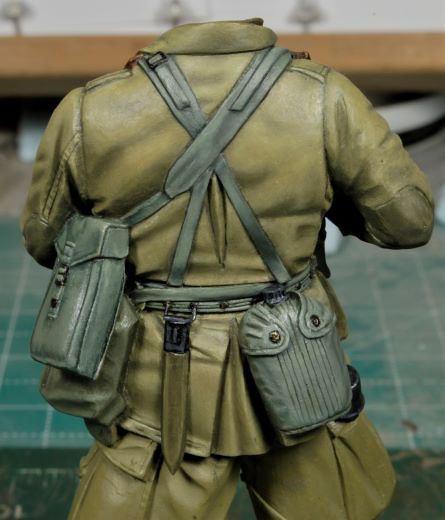
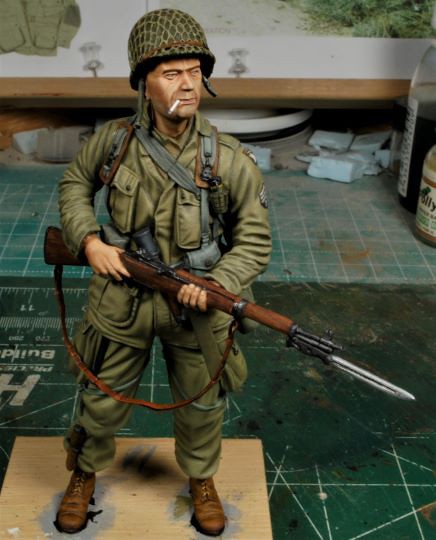
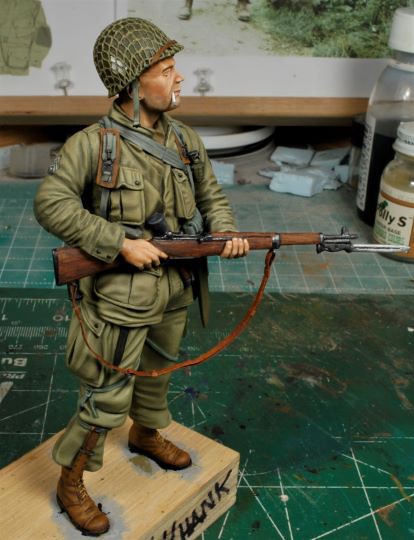
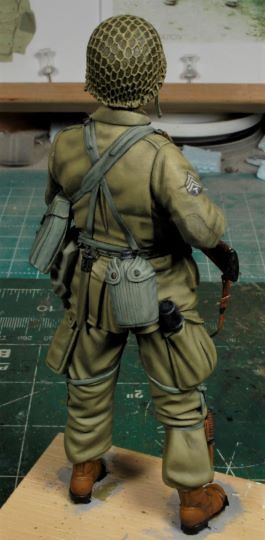
Freddie’s Upper TorsoWith the heads set aside to dry thoroughly it’s time to start on the figures themselves. I started with Freddie and will work through the rest of the team and finish off with “Bob”, the German figure. Yes, he’s now “Bob”, because he’s such a close resemblance to Bob Hope I couldn’t pass it up, HA! You’ll see that more closely later on. 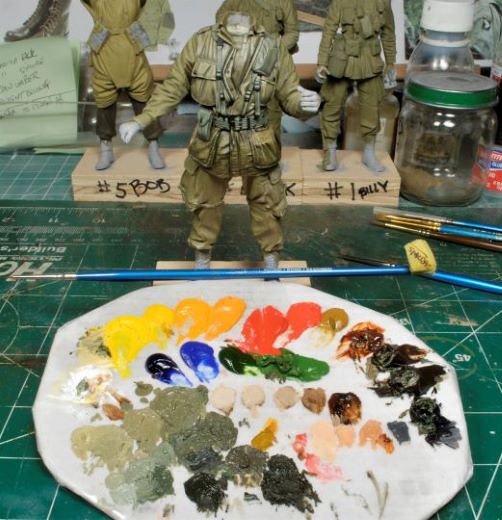 The palette is primed and ready to go. I started on the front pockets, shoulders, and lastly the gear. Always working from top to bottom and inside to outside I am finishing everything that can be done on the first pass. This avoids any unnecessary handling of any portion that would have already been painted. If I had to go back to the buttons and zippers after painting the legs the chances of “rubbing off” paint from the legs is a high probability. This is not much of an issue with 1/35th scale or 54mm, but in 1/16th or 120mm and larger, it is, or at least for me it always had been. So, top to bottom, inside to outside, works every time. The upper half of the torso section has the basic tones in place, so now it’s time to finish the gear, buckles, straps, etc. 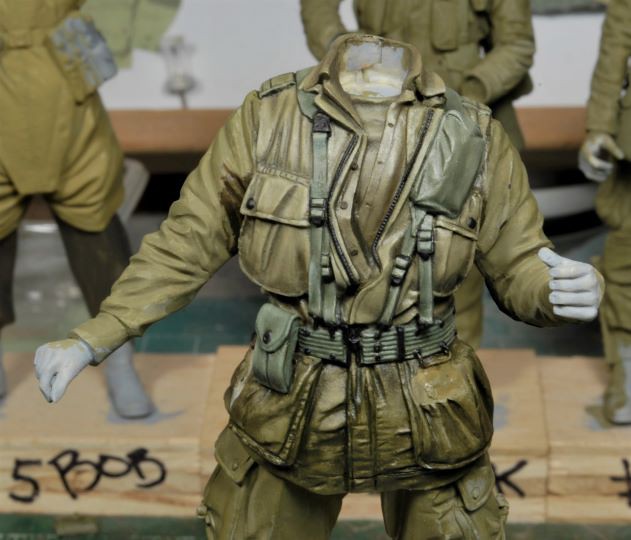 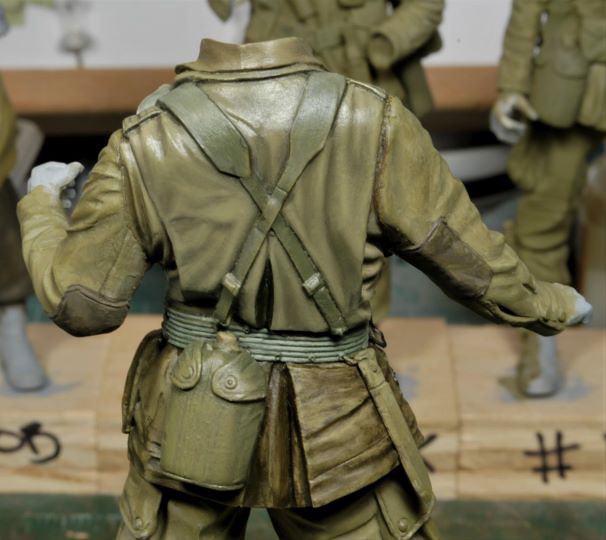 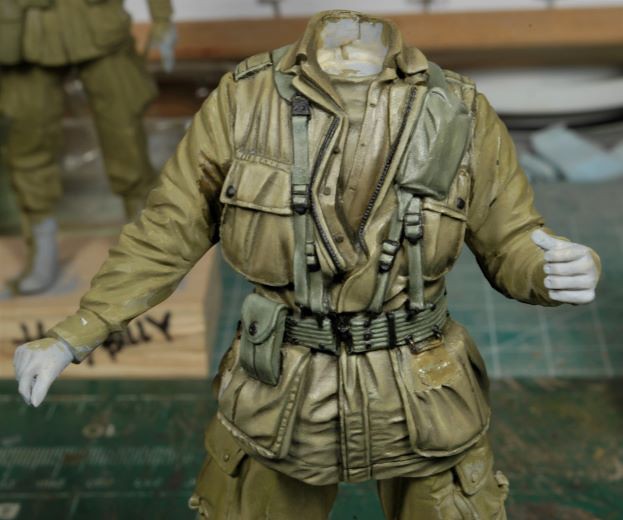 After the lower portion of the blouse has had it’s initial tone applied I worked the rest of the gear. Also I painted the rubbed brass on the buttons, zipper, added worn metal effect on the clips and buckles, and gave all these points a slight Ivory Black oil pin wash. This tones down the brass color and blends in the effect more realistically so the colors won’t appear overly exaggerated. Now it’s time to work outward on the upper half of the torso and finish off each arm. I will wait to paint the hands until the end. I’m finding once again that I’m having to mix the color tones almost every third day and getting those tones exact from the prior session can be challenging. A slight variation can and will be noticeable, at least I can see it, and it’s rather time consuming to remix oils, so the point is to get all the similar tonal portions painted in sequence and save the flesh work for later. 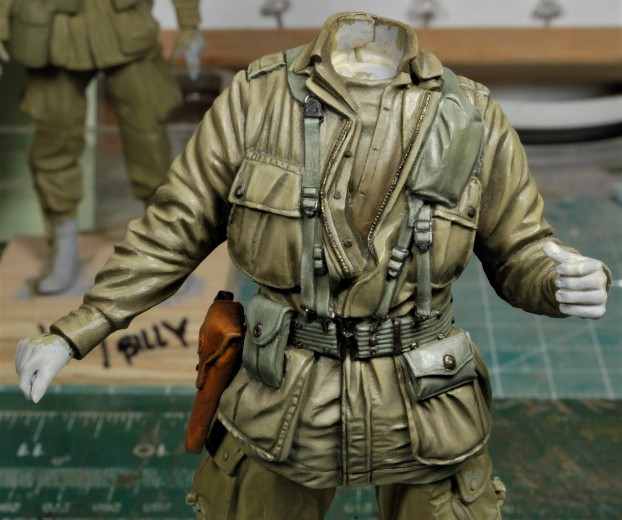 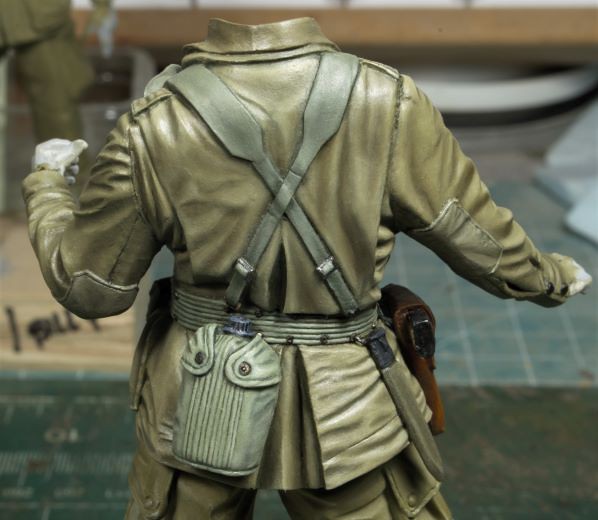 Funny how some things can be elusive when you’re painting only to slap you in the face when you scrutinize the photos, like the Colt .45 ammo pouch which has a blaring gap between the back side and the blouse pocket. That will be handled shortly. Ok, time to work the legs before I have to make another color mix, lol. Thanks for watching. Cheers, Ski.
|
|
|
|
Post by polishbrigade12 on Mar 7, 2023 22:29:07 GMT -5
|
|
|
|
Post by chromdome35 on Mar 9, 2023 11:54:14 GMT -5
Absolutely stunning work Steve!
|
|
|
|
Post by polishbrigade12 on Mar 14, 2023 19:18:48 GMT -5
Tanks, Brian!!
|
|
|
|
Post by polishbrigade12 on Mar 14, 2023 19:18:58 GMT -5
|
|
|
|
Post by mikeh on Mar 15, 2023 0:56:00 GMT -5
Hank likes stick grenades doesn't he.  The glasses were cool enough but to read you put lenses in them too! I have used clear plastic from blister packs to make broken windows for a building in my war gaming miniatures terrain, but those lenses are over the top. And while I was questioning a German named Bart I'm not sure Bob is much better lol. |
|
|
|
Post by polishbrigade12 on Mar 15, 2023 12:34:20 GMT -5
No worries, Mike, Bob looks like "Bob Hope", so it fits perfectly into the semi-comical scenario. No spoilers, it'll be evident later, lol.
The lenses were a chore, but after a couple hundred attempts I finally got it. Thank goodness it wasn't a light bulb, HA!
|
|



 The glasses were cool enough but to read you put lenses in them too! I have used clear plastic from blister packs to make broken windows for a building in my war gaming miniatures terrain, but those lenses are over the top. And while I was questioning a German named Bart I'm not sure Bob is much better lol.