|
|
Post by Whiterook on Jul 21, 2023 20:20:06 GMT -5
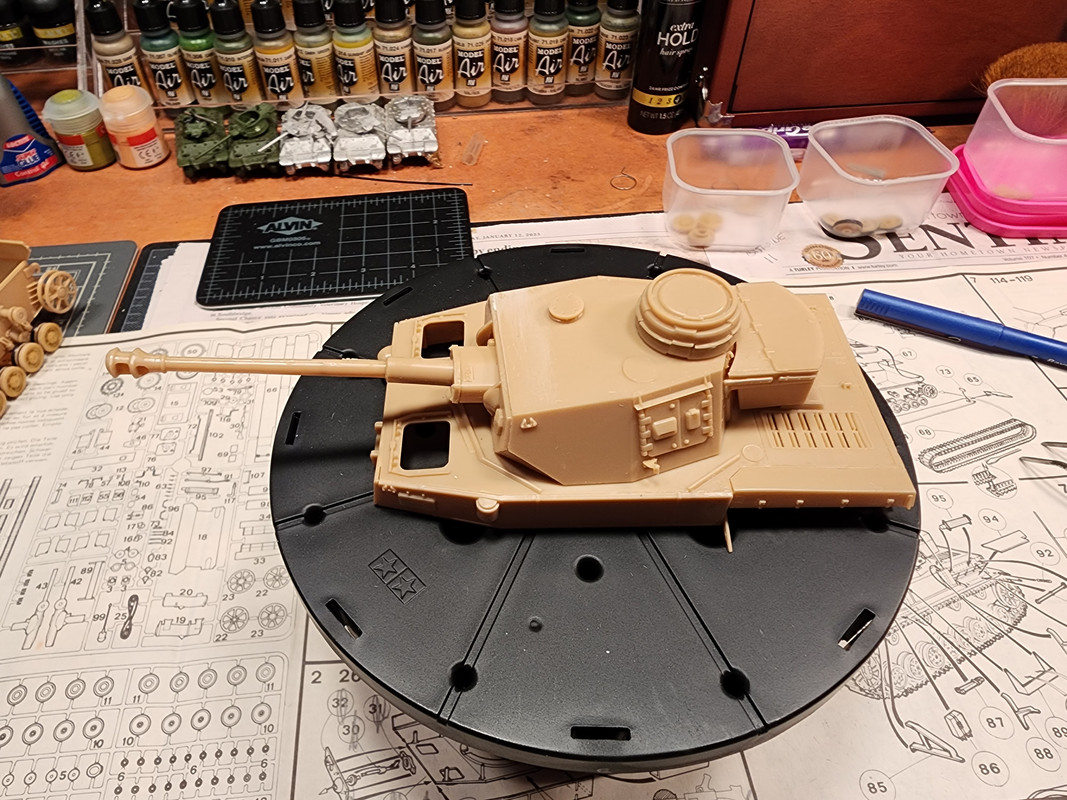
Finally got to the workbench again, having been sidelined by sciatica for a month and a half! I was only able to get a couple hours in, but it was nice to be back in the soup. Started work on the turret tonight and have it completed. The instructions were pretty horrific for this section, and a little guesswork was needed to figure out what wasn’t written or shown put together, but I managed! I started with the upper superstructure of the turret. With the bottom ring and mantlet aside. The hatches went on pretty smoothly, though there’s not a lot of wiggle room. The rear equipment storage area (not sure what it’s name is) was hell to attach, as there are just a few small attachment points and it’s looked pretty precarious, but ended up holding secure this far!  There’s a couple hooks behind the cupola,Mon the back side that was super tricky! …incredibly small hooks that were tough ti position. I did loose one of about six, I think, but I considered myself lucky to finally get those two attached! Upper cupola and hatch, ports went in pretty easily. The gun loader unit did also, but the instructions didn’t really give a good indication how to seat it inside, so it was a dry fit trial and error where I deduced how it “sits”. Again, the instructions aren’t vet specific and it was tricky to get the two rings seated properly with no guide pins or slots to help. The picture in instructions really didn’t give great indication of placement of the notches in each ring, but it looks about where I think they go.  The mantlet was a challenge, as there wasn’t a lot of surface to seat it, but some nimble finger work got it on the base ring unit.  The front of the gun loader barely has contact areas ti glue to the inner assembly of the mantlet area, but I managed after some tricky finger gripping.  That was a relief to see the gun starting to come together and look like it’s where it needs to be. |
|
|
|
Post by Whiterook on Jul 21, 2023 20:34:13 GMT -5
|
|
|
|
Post by Whiterook on Jul 23, 2023 12:52:54 GMT -5
Well, a Big thank you Carlos over at Modelers Social Club for point out I had the mantlet installed incorrectly… it was glued inside the turret! Oopers. I’m so glad he chimed in so quickly, before o got to far beyond that build point. The instructions were confusing and now that it was pointed out, I definitely wanted to fix it!!! …speaking of, thankfully, the turret itself is held in place with a screw-on/tabbed securing deign, so I was able to attempt a fix even had I sealed the upper deck and lower chassis… but not having done that yet, it made a simpler disassembly. I gently twisted back and forth on the connection area inside the turret, accessed from the bottom and was able to get the whole gun out in one piece. It had plenty of room to slip the entire thing right out.  ….but of course, the mantlet couldn’t possibly fit through from the inside, not the base of the gun from the outside, as you can see above so, there really was no graceful way to separate the barrel and mantlet other than to break it off the base of the gun barrel serving as a kid of pin. Snap, it went, but cleanly.  So, there was no way to make a good join without pinning it so, the solution was some sprue…  …I cleaned out the hole on the inner side of the mantlet and the original gun barrel end. Then, I snipped a piece of sprue. Next., using a pair of mini channel lock pliers, I held one end of the sprue pin like a vice and used a craft knife 11-blade to whittle the end that would go in base of what was the barrel end (now, being a small tube, in essence). I glued the in-whittled end into the back of the mantlet, then the whittled end went in the other end… glue applied and held the joined areas together. After the glue set a little, I propped the whole turret up to cure over night.  Crisis averted? |
|
|
|
Post by mikeh on Jul 24, 2023 11:12:21 GMT -5
Good show Em, nice recovery!
|
|
|
|
Post by Whiterook on Jul 24, 2023 15:54:00 GMT -5
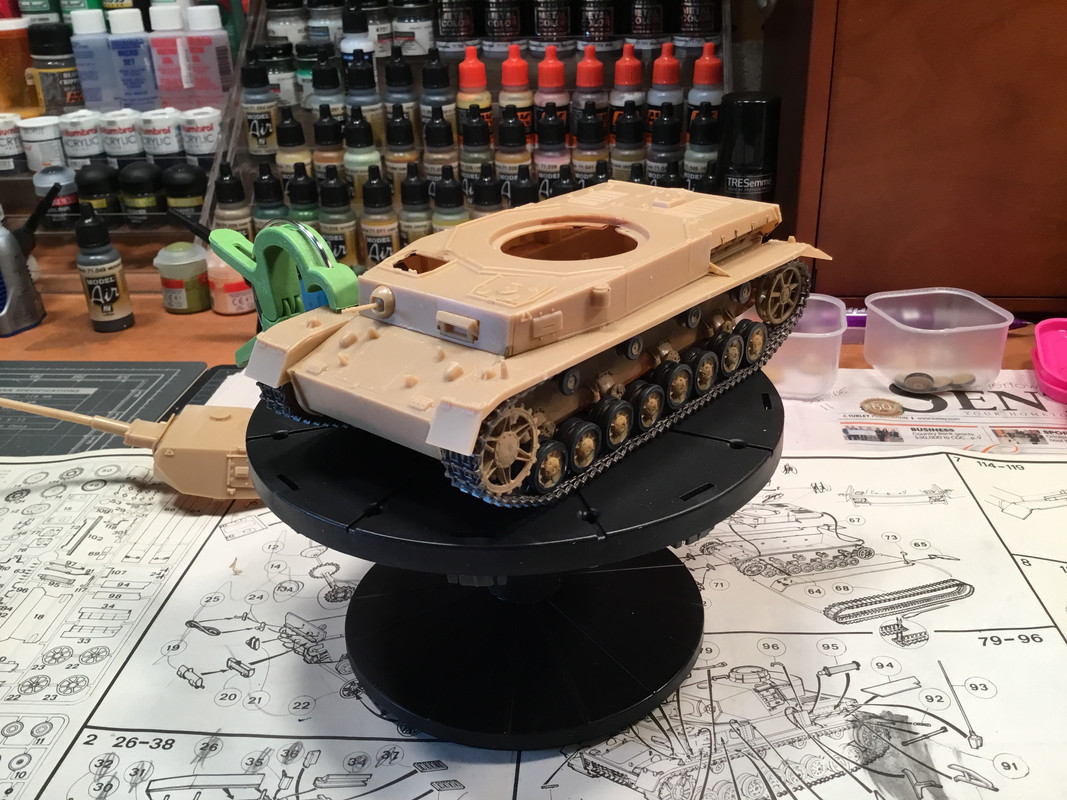
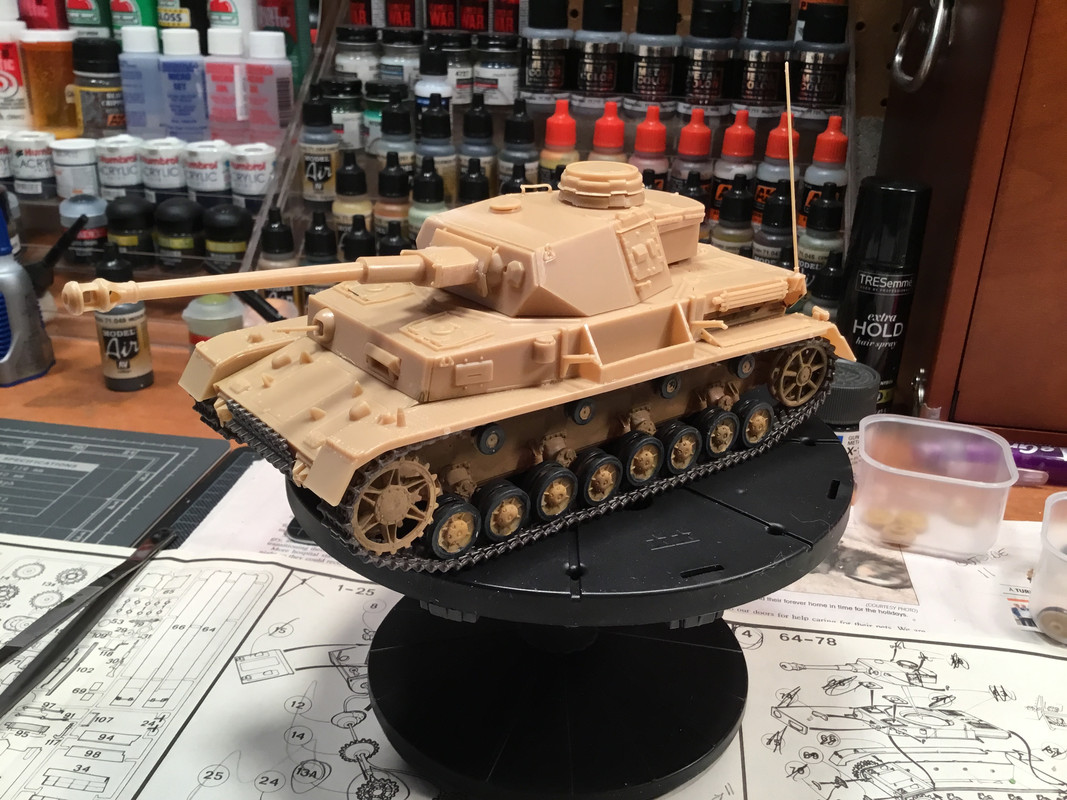
Thanks Mike! …it was a bit of a shocker! Had I just looked at the box art, lol… oh well, a lesson in troubleshooting! Tops on! Getting the top decking on was a bit of a challenge, as there were some issues lining up the joints for the bottom tub. At first, I wondered if I assembled something under the decking wrong, but turns out to be a simple matter of old kit warping. I was able to muscle and clamp what I could, and weathering will take care of the rest   Track decking had tricky assembly for the rear flaps, but things seem to be lining up right.  I decided to leave the gunners hatch open, even though there’s no interior to the tank… I think it added a little extra to the static display possibilities, and the machinegun is puuurty! The build construction isn’t far off from completion now. I’ve been debating whether to put the schurzen/skirts on, and thusfar am feeling I won’t…it’ll save me a little build time, as this needs to be painted, weathered, and placed on a diorama, all within two weeks. |
|
|
|
Post by Whiterook on Jul 27, 2023 16:42:09 GMT -5
Forward momentum with this kit… painted a basecoat on the lower hulls’ sides between the tracks area, so that I could paint up the road wheels and put the tracks on. The first thing I noticed was, I’m bone dry on Dunkelgelb! Ugh. Juuuuuust enough with a bit of water to get a decent couple coats on, but I’ll need to either order some or mix my own (I, sure I can find a mix out there somewhere). The road wheels got a coat of black, mixed with some blue and a dab or white for the basecoat, later followed by Vallejo Sea Grey. Overall… good enough until weathering.  …yeah, I know, I know…the suspensions on backwards! Lots of mud and snow will take care of that, for anyone that tries to peek under the tank and above the diorama base! Anyway, I then, went back in and touched up the dunkelgelb on the road wheels and returns. Getting the rubber tracks on was a pain… to join the ends of the link runs is tough with rubber tracks; I used some CA glue, but needed to pin them together with staples. Trying to get some flex in one run, I snapped the dang thing in half and had to rejoin that. The staples are cool, as the tracks will have mud and snow where they are placed, especially the non snapped on run, which has the staple on the bottom where it will sink into the snow.  Next up was the fenders, which were a bit persnickety to get in there… tight fit and needed some clamping to get the seal to the upper deck.  Started placing on the accessories, but had to call it a night, as my side was hurting. The turret was popped on to see how she all looked to this point… it’s not glued on and is removable and moveable.  Next session will be placing the rest of the pieces on: probably the schurzen and maybe a skirt or two. Then airbrush the basecoat and camo, and decal; last will be hairspray and then whitewash; followed by weathering. A simple diorama will be made, as well… so, she still has a way to go. As mentioned at the start of this, I was building this as a donation for a first place prize for a wargaming tournament, but so much went wrong personally during this build with medical and family issues. The tournament director gave me an out if I can’t finish, but I have the weekend still, and maybe a couple days next week so, we’ll see. If I can’t finish it in time for August 10th, I’ll still donate it for next years’ tourney. |
|
|
|
Post by Geek44 on Jul 30, 2023 3:46:28 GMT -5
Neat build Whitey. Can't wait to see what you do with the hairspray.
|
|
|
|
Post by Whiterook on Aug 2, 2023 18:28:36 GMT -5
Neat build Whitey. Can't wait to see what you do with the hairspray. Thanks mate… it’s been a minute! The Snowcoach was the first and last time I used that technique…I barely remember it all but, retained enough I should be fine, with a little brush up on YouTube  |
|
|
|
Post by Whiterook on Aug 2, 2023 18:34:24 GMT -5
So an update… good news bad news, kinda update:
The bad news is is, with everything that’s piled on and gone wrong with family and body, I just plum ran out of time to be able to deliver this to the wargame tournament director…but have promised it to him next year. He’s more than cool with that, I’m glad to say.
The good news is, I can slow my roll a bit and finish this build out without being rushed, and thereby achieve more with its quality. I had already planned a few compromises with it so, fortunately I don’t have to do that now!
So, on with the build!
|
|
|
|
Post by Geek44 on Aug 3, 2023 23:01:36 GMT -5
I've only tried it once. Didn't really produce the results I wanted but that's likely down to me.
I used hair spray intended for men as it "holds" less. I also used Tamiya paint diluted with water rather that acrylic thinner.
|
|
|
|
Post by Whiterook on Aug 8, 2023 12:49:56 GMT -5
I've only tried it once. Didn't really produce the results I wanted but that's likely down to me. I used hair spray intended for men as it "holds" less. I also used Tamiya paint diluted with water rather that acrylic thinner. As I remember it, I used a crappy, budget brand of hairspray, but it did the job needed… however, I got some Tresseme this time, which is far better a product so, I’ll be excited to see how it works out in comparison. As an aside, I’ve wondered how these chipping solutions work, like the AK Interactive stuff… I think I actually bought some at some point, but will stick with the basics for now. As an asides’ aside, I bought some Tamiya “Dunkelgelb” XF60 Flat Dark Yellow today, so, I’ll be ready to get some paint in the bucket once I finish building. I’ve been terribly busy moving mom in law’s stuff the past few weeks so, progress ground to a halt…but am hoping to get the rest of the building process done next week. |
|
McCoy
Sergeant

Posts: 227 
|
Post by McCoy on Aug 9, 2023 13:48:53 GMT -5
As an asides’ aside, I bought some Tamiya “Dunkelgelb” XF60 Flat Dark Yellow today, so, I’ll be ready to get some paint in the bucket once I finish building. I’ve been terribly busy moving mom in law’s stuff the past few weeks so, progress ground to a halt…but am hoping to get the rest of the building process done next week. Remember to lighten the XF-60 with at least 20% XF-2 as it's way to dark and yellow. |
|
|
|
Post by mikeh on Aug 17, 2023 16:59:03 GMT -5
Looking good Em, waiting to see some paint on it!
|
|
|
|
Post by Whiterook on Aug 20, 2023 17:57:36 GMT -5
Looking good Em, waiting to see some paint on it! A little construction left on her… sciatica really set me back, but I’m feeling like I can sit at the bench now…I didn’t want to aggravate the healing. I am anxious to get back to this build, though…I had some great momentum going. This particular is gonna be a priority, with a couple already partially done in different stages, and Speed Racer’s “Mach 5” about to be unsealed! …that latter is for a Group Build at Modelers Social Club; I haven’t been part of a group build since World War Two Zone! |
|
|
|
Post by Whiterook on Sept 1, 2023 19:01:11 GMT -5
It’s been difficult to get time at the workbench… it’s a holiday weekend here though, and Karen wants to stay in at home so, other than setting up some new computer equipment, I’m planning to work on this kit and hopefully finish most, if not all of the construction! …I figure once I get a little time into building again, I should be able to get the forward momentum back in gear! Stay tuned!
|
|


