|
|
Post by Whiterook on Jan 7, 2023 14:10:56 GMT -5
 This will not only be the first full kit build that I’ve done in a long long time… a right out of the box build, but also my first full kit build in retirement! Seriously, it’s been so long since I built a kit (maybe a decade? …I’ve lost track!), it’s going to be interesting to see how much rust I need to shake off. Kit number, N-218, being marked with the older company logo of Italaerei, this is a kit made around 1975, and time will tell how well the parts fit will be. Oddly enough, the company is still selling this very kit to this very day! There is also a retool, I’ve heard; and I have a much newer kit from another manufacturer, but this is a good practice kit for that. I intend to build her with a Winter camo, probably chipped paint. It comes with figures, but we’ll see how good and adaptable they are to a Winter scene. |
|
|
|
Post by Whiterook on Jan 15, 2023 16:46:08 GMT -5
Roadwheels! …for me, never fun, but usually the first starting point on a tank build.  After snipping them from the sprue, the first step was to trim off the plastic nubs from where they were attached to the sprue, with a #11 blade craft knife; cleaned the flash on the wheels with a sanding stick. I just get into my Zen Zone and go at it! I placed them, pre-sanding, into the tank hull pan (is that the term… or chassis?) just to keep them handy and safe from inadvertent spilling… then split them into two piles for the different sides of attachment onto the transmission suspension (…I wish I knew tank parts like so many other fellas do…I feel like a bit of a dolt, haha).  Fairly decent instructions provided with the kit. The road wheels use the old heated screwdriver tip method… not a fan! I’m not even sure why it’s done, but then again, I didn’t really look too hard, yet …we’ll see how I approach that later  So, the build is off and running! I won’t lie… I’ve a bit of butterflies in the stomach on this one, as it’s been so long since I did one box, to build completion. That’ll fade soon enough, as I build and get back in the saddle. This is a pro bono donation to a wargaming tournament in August, so I have plenty of time in that regard. |
|
|
|
Post by mikeh on Jan 22, 2023 13:54:54 GMT -5
I remember this old fella! I think it went together ok, I do remember the tank commander always reminded me of a stooped old man. The MP in this kit is a pretty universal figure used in a lot of their kits at the time, mine came with a kit of the Afrika Korps and made up into a pretty nice figure.
PzIV's are a favorite of mine so I know the drudgery of road wheels and the feeling of elation when they are finally done. Looking forward to seeing this one getting built up.
|
|
|
|
Post by Whiterook on Jan 22, 2023 18:19:51 GMT -5
I remember this old fella! I think it went together ok, I do remember the tank commander always reminded me of a stooped old man. The MP in this kit is a pretty universal figure used in a lot of their kits at the time, mine came with a kit of the Afrika Korps and made up into a pretty nice figure. PzIV's are a favorite of mine so I know the drudgery of road wheels and the feeling of elation when they are finally done. Looking forward to seeing this one getting built up. Thanks… and yeah, it sure is an old kit. I posted on a Facebook model group and a couple members mentioned it did go together well, except for the tracks, which they thought were super tight. I’ll see what they’re like when I get to the point where the lower chassis is all done… I could always leave some tracks off the top, as the skirts will hide a decent area…or, I could get after market (same with the figures), but I am trying to stay with an Out of the Box build. I’d mentioned, I’m doing a Winter camouflage… when I bought a newer kit some time back (Tamiya?), that’s what I wanted to do for that kit; but I am using this build as a learning curve, especially with chipping… and also, if it turns out nice, this is a likely donation as a prize at an Advanced Squad Leader tournament next August, which is a winter war theme. |
|
|
|
Post by Whiterook on Feb 21, 2023 14:09:35 GMT -5
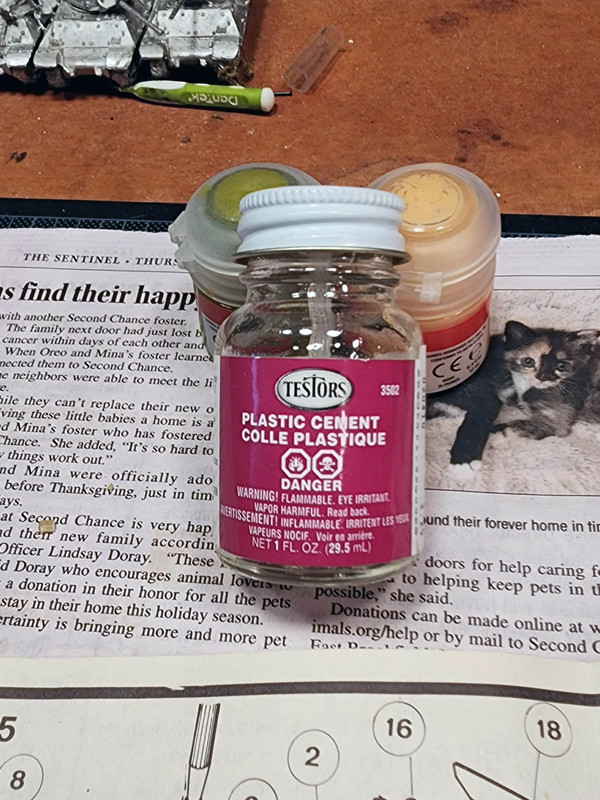
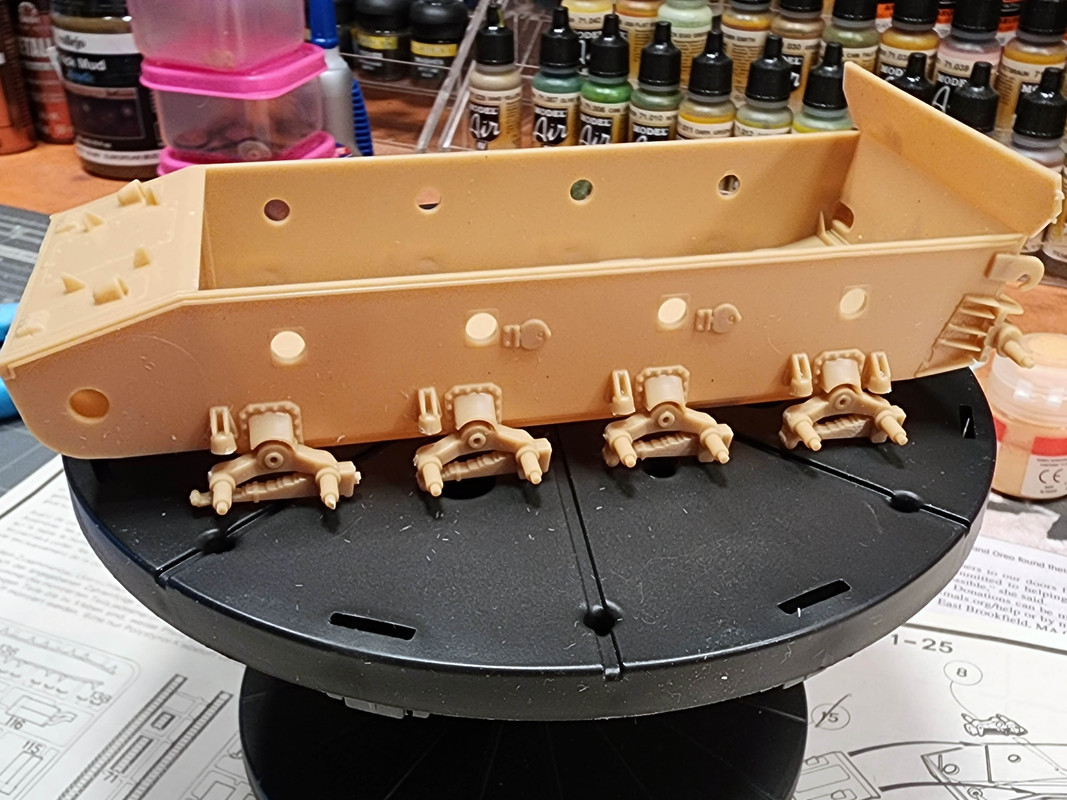
A couple hours of work continued with the Pz. IV. Yesterday started with suspension work, attaching the eight spring suspension units to the tub. Cutting these off the sprue was a hassle, as the plastic is old hard, brittle plastic and sharp-eyed folks may notice a couple missing ends on one side of this crate. Ugh. Well, nothing a generous amount of mud can't hide in the end, right! The units went on fair enough, but I should have dry fitted the suspension road wheels on to let dry in an even, flat-ground pattern...ooops...needed to tweak a couple susension units after it dried, which was a little hairy, but nothing broken. Today, the glacis plate went on the front and the fit was wonderful! Some kits can be a pain, but this went in smooth as butter! So folks, I had an issue develop yesterday: My old, rusty Model Master Liquid Cement (black label, pictured below) was empty as a dry camel in the desert! I tried looking online and this stuff seems near impossible to find these days, at least on Amazon (my Go-To these days) Oh oh. Digging in my supplies, I found a new bottle of Testers Non-Toxic Liquid Cement (blue label) I bought at Hobby Lobby a few months back... it's OK, but the nib sucks, being plastic with a rather large exit at the tip end ('cause you need to cut the sealed tip off!), as opposed to the nice and thin metal feed rod of the Model Master cement. I'm sing it, but it's harder to precision apply. I did find a bottle of Testors Liquid Cement, the clear glass bottle type with the brush in the cap... I used on the glacis plate, and it was a wonder to behold!!! The capillary action worked perfectly on that part!!! ...not as easy on other parts.  So, I have some questions on the third for ya'll: On the Testors Liquid Cement (the clear glass bottle one)...  ...who all uses it and what do you think? How do you use it...with the cap brush or an artist brush? Can you speak a little bit about any pitfalls? OK back to the build... today, I noticed another error made: In the diagram pictured, you can't really see it too well but the #1 parts, these itty-bitty conical plug-like thingies (there goes more of those super technical jargon), are supposed to go up into the mounts for the suspension units. Ugh! I was able to get them up in those tight areas (due to the suspension already being mounted) with a pair of angled tweezers, but that was a hassle!  I also mounted the rear of the tub, and the rear idler spindles. 
  So, on the plus side of all this, it was enlightening and a relief to me that after so long an absence from kit building, just this little bit has dispelled any worries I had on rustiness in my building kits again and built my confidence back up to where it once was... though, there is considerable rust! I forgot a lot of terms and techniques, but that will resurface! |
|
|
|
Post by chromdome35 on Feb 21, 2023 16:51:03 GMT -5
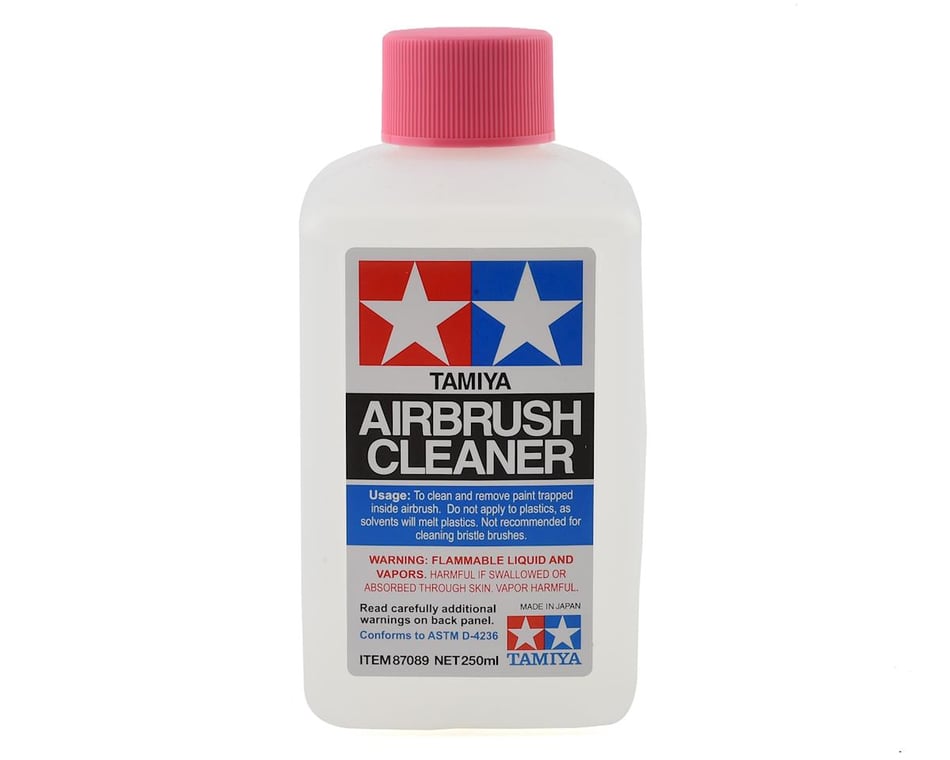
It's going together great! I have a bottle of that testers glue, I never use it. I use Tamiya Extra Thin, or if you want to save a few $ get Tamiya's airbrush cleaner in the 250ML bottle. It's the exact same thing as Tamiya Extra Thin. It's what I use on every model I build. I also use it to make my sprue goo. The airbrush cleaner in a 250ML bottle is around $7 to $10 bucks online. The Tamiya Extra Thin in the 40ML bottle is $6 to $10. You get 6 of the bottles ($36 to $60) out of one container of airbrush cleaner for $10.  |
|
|
|
Post by Whiterook on Feb 21, 2023 17:14:05 GMT -5
It's going together great! I have a bottle of that testers glue, I never use it. I use Tamiya Extra Thin, or if you want to save a few $ get Tamiya's airbrush cleaner in the 250ML bottle. It's the exact same thing as Tamiya Extra Thin. It's what I use on every model I build. I also use it to make my sprue goo. The airbrush cleaner in a 250ML bottle is around $7 to $10 bucks online. The Tamiya Extra Thin in the 40ML bottle is $6 to $10. You get 6 of the bottles ($36 to $60) out of one container of airbrush cleaner for $10.  I didn't realize that about the airbrush cleaner! ...seems weird they have a product that both cleans paint from inside an airbrush but will also glues stuff! yikes. Question: Do you ever use an artist brush instead of the brush mounted on the inside of the cap? If so, what kind of hair...I am wondering if synthetic hair is OK, or does it have to be animal hair? ...and lastly, do you leave the artist brush dry and reuse, or do you have to clean it and with what? And a Final Jeopardy Question: What the hell is 'sprue goo"? (...I'm kinda afraid to ask!) |
|
|
|
Post by mikeh on Feb 21, 2023 17:24:01 GMT -5
If the same as I know it sprue goo is a home brew seam filler, I'll let chromdome tell the rest as we may be thinking of two different things.
|
|
|
|
Post by mikeh on Feb 21, 2023 17:29:05 GMT -5
As for your clear bottle of cement you are supposed to fit the parts together and touch the brush loaded with cement to the seam between the parts and let capillary action draw the cement along the seam.
|
|
|
|
Post by Whiterook on Feb 21, 2023 17:37:11 GMT -5
If the same as I know it sprue goo is a home brew seam filler, I'll let chromdome tell the rest as we may be thinking of two different things. Oh, that makes sense! I’ve never seen it or it being used, but seems an interesting alternative to putty. In what you think this might be, I assume you stick very small bits of sprue in a piece at a time and allow to dissolve? Have you made some and used this on any kits? As for your clear bottle of cement you are supposed to fit the parts together and touch the brush loaded with cement to the seam between the parts and let capillary action draw the cement along the seam. Funnily enough, I found a YouTUBE video shortly afterwards that explained just that! …a great vid. He used an artist brush, and I’m now looking up what brush hairs can be used (I.e., synthetic, natural badger, etc.); and if you need to clean the artist brush after and with what, or can you just reuse a used brush later, over and over? |
|
|
|
Post by chromdome35 on Feb 21, 2023 17:51:28 GMT -5
I would use an old sable brush since cement is usually just some chemical that melts plastic. Synthetic brushes might melt.
Normally I just use the bottle brush.
|
|
|
|
Post by Whiterook on Feb 21, 2023 17:59:59 GMT -5
I would use an old sable brush since cement is usually just some chemical that melts plastic. Synthetic brushes might melt. Normally I just use the bottle brush. That’s kinda what I figured… I’m not thrilled with the Testors brush, as it’s chunky ended and the bristles are splayed. I want to search around my supplies to see if I have a bottle of Tamiya… I swear I bought one way back, but I just can’t remember. Thanks! |
|
|
|
Post by Whiterook on Mar 3, 2023 19:10:45 GMT -5
Back at the tin can a little today, splitting my time between two kits (also have a P51-D Mustang in the works), as well as design on a Vietnam War miniatures wargame. So first big news… I’m a Tamiya Extra-Thin convert! OMG, this stuff is gold! Game changer. Started with two L-shaped holders that secure a big-assed cable to the rear of the tank. I was holding the first one with angled tweezers when, Phwiiiing! …popped out and I feared was gone forever. I mean this piece was tiiiiiiny! Unbelievably, I found it on the bench! They’re both on the tank now… the cable cracked in one spot, but I was able to rejoin it with glue. Next, the muffler and a small side unit went on.  Next was, attaching two sides of the upper hull… man, I love me my Tamiya Extra-Thin! My hands aren’t as rock steady as they’d once been, not that I’m feeble or anything, ha, but dexterity is a little weaker, and I have a left thumb that doesn’t behave properly when pinching with my index finger — the Tamiya glue is a lot easier to maneuver than the pipette on my old Model Master brand (which I can’t find, anyway).  I stopped here for the night, but plan to put some more time in on her this weekend. |
|
|
|
Post by chromdome35 on Mar 3, 2023 21:42:12 GMT -5
Going strong and looking good. I HATE that sinking feeling that you get the second after a part launches itself into the netherworld. Glad you found it! I'm looking for a microscopic piece of PE that went flying yesterday, would you look around your bench, it's probably there!  TET is awesome stuff. There is a reason it dominates that category of the modeling world. |
|
|
|
Post by Whiterook on Mar 4, 2023 16:34:14 GMT -5
Going strong and looking good. I HATE that sinking feeling that you get the second after a part launches itself into the netherworld. Glad you found it! I'm looking for a microscopic piece of PE that went flying yesterday, would you look around your bench, it's probably there!  TET is awesome stuff. There is a reason it dominates that category of the modeling world. I was lucky with that particular part, especially where it was maybe 3/26th of an inch, the width of Angel hair spaghetti! I’ve not been as lucky hunting down the outer wheel hatch for one side of my P51D Mustang! …I’ll either have to consider leaving the model without it, or fashion a makeshift one; I have thought about making the bird a wounded crate, with some bullet holes, hahaha. On the TET… yeah, it’s amazing stuff indeed! I did try to get some of the Tamiya Airbrush Cleaner but Amazon’s been out of stock on it…I’ll get some at some point…you were absolutely right, in that it’s basically the same stuff as is in the small jar. |
|