|
|
Post by Whiterook on Jun 28, 2024 9:33:24 GMT -5
My Bite the Bullet, competitive variant game project continues in development and construction, in this stage, with Counter Spinners! Yes, there are pre-made ones made that can be bought, the front runner being these…  …and it may come to that depending on how this particular component project goes  …but I’d like to see if I can make a set that is customized for this game in particular. |
|
|
|
Post by Whiterook on Jun 28, 2024 9:39:25 GMT -5
This particular video really got the juices flowing with possibilities!
…it’s for Magic The Gathering, built I won’t hold that against the maker of these cool spinners! Up to the point of seeing this particular vid, I’d been looking at disc spinners; considering the use of rare earth magnets as the center pole, as I don’t want to invest in a rivet set. But then I saw this and, “Holy Spinners, Batman!” …freaking cool AF!!! What I really am jazzed about is that I can envision game specific imagery for the card spinners, which really hone them into the game.
This is gonna take some thought and planning… the first item of business being the numbered dial, and no, I have no idea (yet) how to make one. I do know it will most optimally need 16 numbers…so I’ll start here.
|
|
|
|
Post by Whiterook on Jun 28, 2024 19:18:41 GMT -5
And we’re off!!! The first thing I was trying to do was try to figure out how to make a number wheel, which wasn’t easy at all… I found a couple that weren’t bad, but not what I was trying to get towards. I realized I could ask the guy that made the video for any templates he has, and lo and behold he had linked them in the chat on the YouTube video! Totally missed that the first time around. Checking through his PSD files (Photoshop), I looked at what he had and downloaded one that I thought would work best… I have Photoshop Elements, so I was able to manipulate the spinner of choice, deleting three images at the top of the front spinner counter cover, and adding in an old west, Winchester art image to customize it for what it’s going to be used for, which is to track Winchester rifle ammo expenditure and loading.  I left the back as is for now… I might change it to something more game customized tomorrow…  After getting what I liked, I printed it off on heavy cardstock…  So I’m on my way! |
|
|
|
Post by Whiterook on Jun 28, 2024 19:33:52 GMT -5
The top spinner cover was cut with a metal straight edge and X-acto craft knife for nice straight edge cuts…  The number window was the trickiest bit, but a sharp craft knife does the job nicely…  A small pair of precision scissors were used for the dial access notches. Next step was to glue it to a SMEAD Pressboard cardstock. I decided to apply the Elmer’s Glue Stick glue directly to the spinner arts’ back and then affix it to the pressboard.…  Cutting through the pressboard is a lot tougher, again, the number window done with the craft knife and the rest with scissors…  For this project, I decided I wanted to a nice, substantial feel, hence using pressboard; the inspiration spinner in the video is done on glossy picture printer paper entirely, so it’s very flexible… I chose this as my first major departure from the other designers’ concept. |
|
|
|
Post by Whiterook on Jun 28, 2024 19:39:43 GMT -5
The dial followed in the same vein as the spinner counter cover, where I first cut the dial out with scissors, and then applied glue to the back and affixed it to pressboard; then cut the dial out once again with scissors.  As you can see above, I cut a section of pressboard out just a little bigger than the dial and then trimmed some corners… this gave me a better grip and less to cut. The first two elements made and they look great.  So far, I like where this is going. It’s time consuming, but not horrifically so. |
|
|
|
Post by Whiterook on Jun 28, 2024 19:59:01 GMT -5
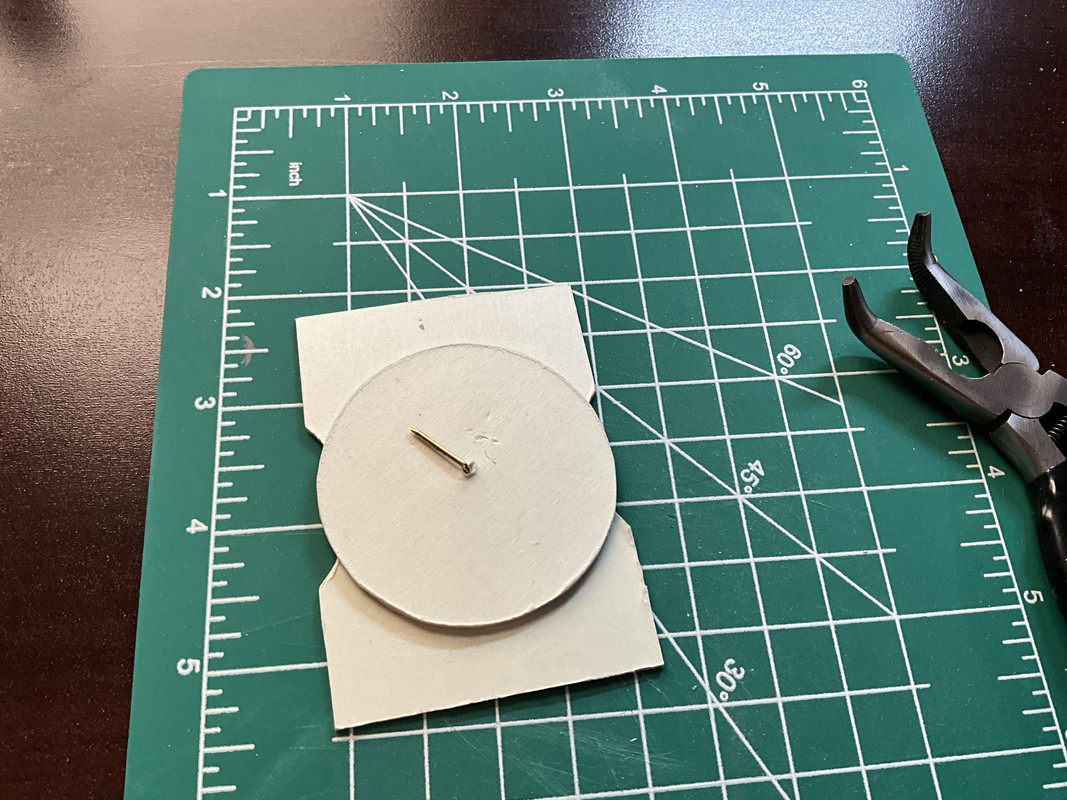
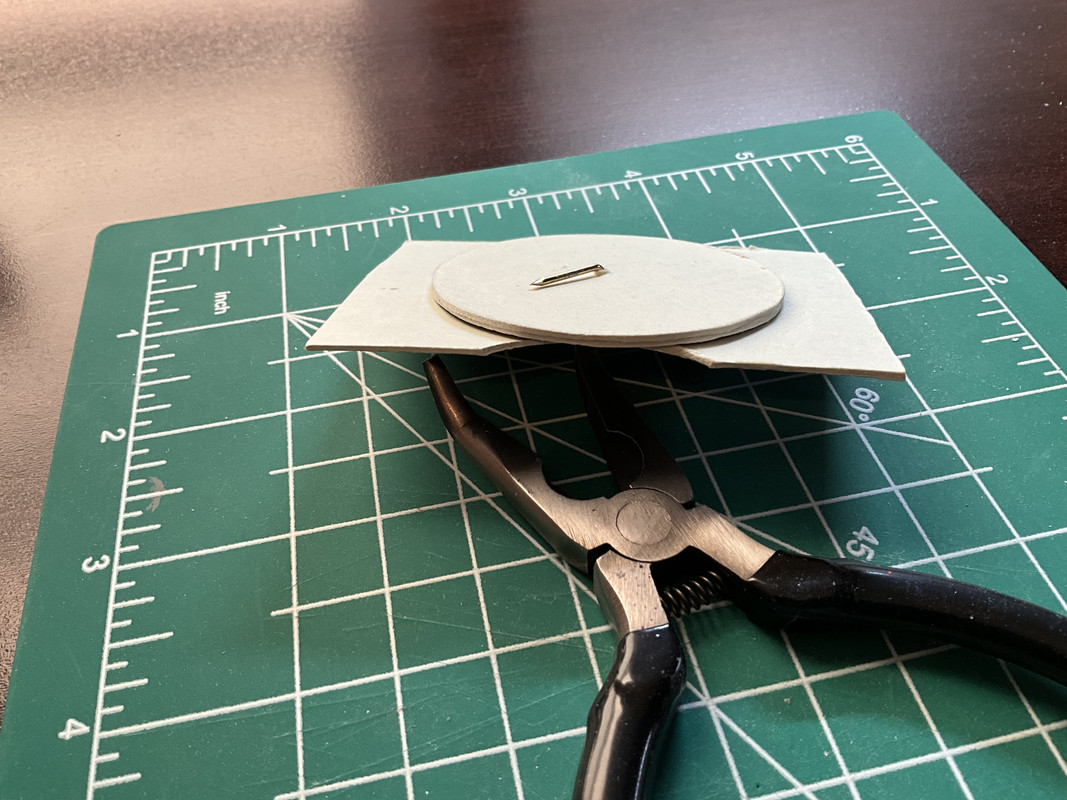
The trick here is how are you going to affix the dial to the spinner counter cover? The other designer used a sewing/shirt pin, but first of all, I don’t have any, and second of all, that seemed a little too flimsy to me… the pin head might hold for awhile, but a pin head isn’t very big so, repeated handling has to take a toll I would bet. I considered rare earth magnets, but I decided to try something closer to the original inspiration… so I looked in my tool chest at what brads I had and found a nice brass one…the others were too thick to bend. I used a pair of angled needle nose pliers to bend the top of the brad just under the head. I immediately noticed the brad shaft was going to sit too high, so I doubled up the layers of the dials’ pressboard, which has the added bonus of giving better dial grip! I then used a small needle awl punch to make an entry hole in both the front cover and dial…  Next, I used the needle nose pliers to insert the brad into the cover and then the dial…  …then hooking it over to the back side on the reverse of the dial…  
I did end up placing a bit of Tamiya masking tape over the brad end, just so repeated spinning of the dial and the sharp end of the brad doesn;t wear down the dial surface inside the whole unit. Everything was going pretty smoothly to this point, but this is where things started getting real complicated! As mentioned earlier, the model I was basing my design off of was made on thin, picture cardstock paper and is very flexible… when he put the back cover on, it basically flexed at center to make room for the dial; mine could incorporate that design element, but again, I want something more substantial. After pondering this for a bit, I decided I’m going to build up brackets at the inner top and bottom, to which the front and back counter spinner cover will attach… all theory, so we’ll see what happens! That’s a problem for tomorrow!!! |
|
|
|
Post by mikeh on Jun 29, 2024 12:17:59 GMT -5
Pretty cool! How thick is that card stock and where do you get it?
|
|
|
|
Post by Whiterook on Jun 29, 2024 22:04:02 GMT -5
Pretty cool! How thick is that card stock and where do you get it? You know, I’ve never measured the thickness of the cardboard, but just checking it now, it’s 1/32nd inch thick. Here’s one of the counters I made for this game…   If I’m perfectly honest, I rescued four boxes from heading to the dumpster at work many years ago  One of the offices was clearing out a supply room and I went over to see what they were tossing… saw those boxes and snagged them! …they were literally in one of those rolling trash bins that I followed to the loading dock and proceeded to jump in head first!!! …no one said a word when I said, better to me than the town dump. You can get it here at Amazon, usually just under $40 for a box of 25 folders. You don’t need the higher expansion joints, so the lowest 1” would be fine. I know that sounds expensive, but it is the absolute best cardboard material I’ve found for making counters and it looks pretty darned close to what the game companies use in my opinion. |
|
|
|
Post by Whiterook on Jun 29, 2024 22:15:20 GMT -5
So, I just couldn’t leave those Magic the Gathering symbols on there (front and back), so I took some time to modify the front and back covers today…  Now here’s where it got weird: I was just going to glue a new front cover over the old one, but when I went to print the sheet, everything came out about an 1/8” or more bigger on both top and bottom! Something to do with scaling in conversion from Photoshop to a PDF or JPEG; I have no idea what I did the first time around and in order to get a perfect resize from may computer to the printer would have wasted a ton of color printer ink, so I scrapped the old spinner assembly and made a completely new one. The good news is, it’s not uncomfortably or annoyingly bigger, and assembly went much quicker now that I’d done one… my wife consoled me by saying the first one was a “test run” (…I’ll go with that!). This is where it stands of tonight…  I did try and flex the back cover on, touching at the top and bottom, and even mounted on the SMEAD pressboard cardstock, the dial turns well enough that I could just try that, but I’d be worried the glue hold would give up with repeated use and storage, so I think I’ll just go with my plant to make spacers for the top and bottom; maybe three or four layers a quarter inch down and the width of the cards… I could try and make elongated U-shapes so as to nudge down nearer the dial, but matching edges on layers is a pain in the rump and I’m not sure it’s worth it…we’ll see how I feel about it tomorrow. |
|
|
|
Post by Whiterook on Jun 30, 2024 16:26:09 GMT -5
So last night in bed, I thought of a possible solution for the separators between the front and back covers… foamcore board! I remembered also that I had some scrap in the model building workshop. This morning, I went down and found a small scrap and testing it out on the counter spinner, I think that was just the thing!!! …I’d been building up layers of pressboard and that was a bit of a disaster, from a lining edges up standpoint, and this does the same in providing a buffer in one fell swoop.  Those penciled in rectangles weren’t for this project, by the way… I’d used this piece a few years ago when trying to figure out how to make separators for the inside of a storage box for some game equipment. I cut small beams the size of 1-1/2” x 3/8”, allowing for the natural thickness of the foamcore board…  Gluing them on was easy, as the foamcore board has paper on both sides, which glued perfectly to the cover undersides…  …I also took the opportunity to fill in the back side outer dial area with black Sharpie pen; when dry fitting and trying the fit, I noticed the back of the spinner dial was glaringly bright against the dark covers. |
|
|
|
Post by Whiterook on Jun 30, 2024 16:30:23 GMT -5
The final product! My Bite the Bullet, Winchester Rifle Ammo Counter Spinner… Front…  Back…  Side…  |
|