Post by Whiterook on Sept 28, 2022 14:16:28 GMT -5
Taking it to the Germans (Playtest NEV7-1)
26th May 1940, Le Cornet Malo, Belgium.

As the fighting for the village of Le Cornet Malo went back and forth, Capt. Hallett of "B company" took a patrol to the southern sector of the village. Here the patrol engaged the SS Totenkopf Division as they prepared to send reinforcements into the fighting.
I need to be vague on this Advanced Squad Leader Starter Kit scenario, as this is a playtesting session, but basically, we’re talking about WWII 1940, where the British have inserted a small infiltration unit in a German occupied Belgium village, with a larger patrol force moving in from outside the village. The objective is to reduce the Germans to two or less units (counters). Outright elimination and seizing the village is a long shot, as the British are engaging an SS Totenkopf Division firmly embedded in the Village.
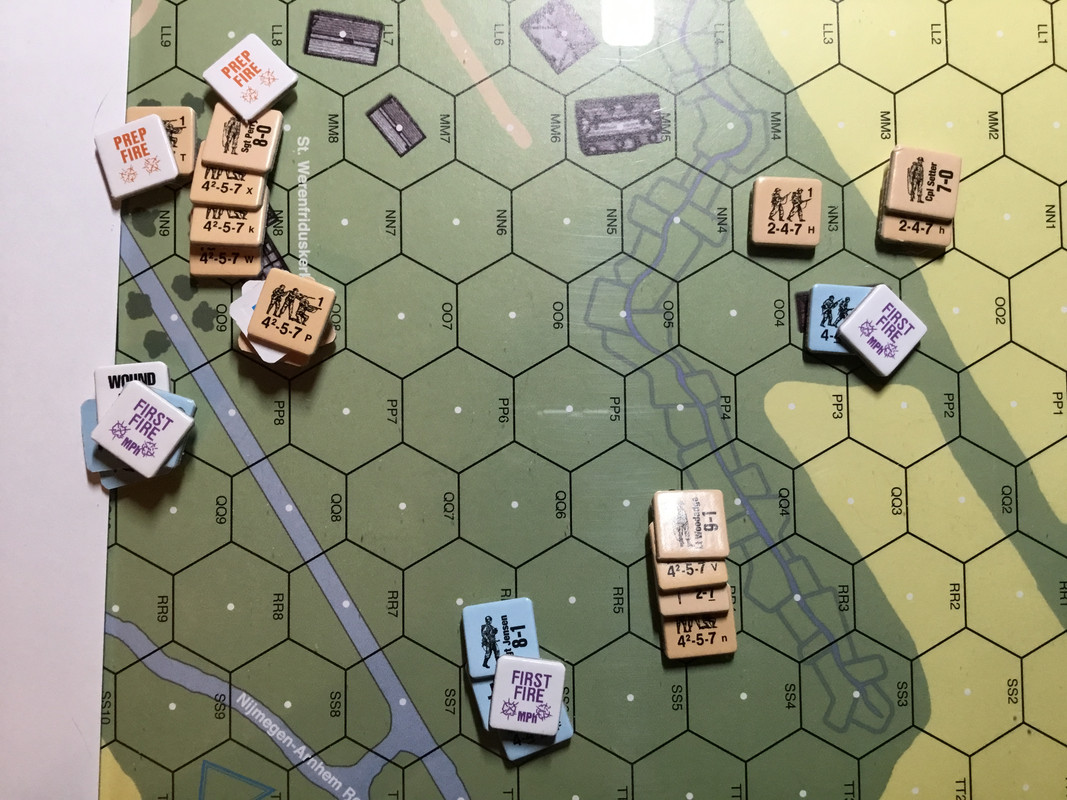
What you see below is the entire available battlefield. Germans setup first, followed by the British infiltration unit, which both sides could be anywhere that village battlefield. I’m playing this solitaire so, I do as I usually do… what’s the best tactics for setup and in each turn. For initial German setup, thinking as that player, I kept in mind that I needed at least 2 unbroken, Good Order units by the end of the British 5th turn (Germans only get 4), hence one of the strongest German squads with a LMG, fortified with a Leader (a sergeant) at the bottom (East) if the map; that machinegun can actually reach the top of the battlefield, with LOS… so it’s my last-stand-sentry! The odd counter you see on it is a piece of counter sheet that is cut roughly to a counter size… it’s the remind me that those units are “Hidden in Place” (HIP). The HIP rule is one for artillery units, but in this scenario, an SSR allows Infantry to use that — though since I’m playing it solitaire, where you’d generally keep those units off the board unto they are revealed by being in LOS of an oncoming enemy units, or they move or fire, I’m just placing them on the board.
Since this is an offensive deal for the German SS, I set the rest of the division forces mid-battlefield in stone buildings, which is a bit nerve wracking having those forces so far forward, but there’s not a lot of cover to their rear line.
The British infiltration force are nestled in stone buildings right next to German units! That’s kinda terrifying, actually! Cam you say, “Close Combat is a coming!”?
 ,
,
TURN 1 - British
The British infiltration force first used their Prep Fire Phase to do some damage to the adjacent Germans, but bullets just pinged off the stone buildings! Nada. The following Movement Phase found the rest of the 2nd Royal Norfolk’s units advance onto the battlefield. I chose to enter in the best areas that had LOS restrictions from the Germans, which were few and far between! I thought of entering on the right (North) side into the Grain fields, which are in season, but even with the LOS hinderances, combined with slower movement restrictions made it a slow slog and open to incoming Defensive Fire; with the German SS entrenched in stone buildings clustered on the opposite side of the map, the best that would have done would have been to try and flank a minimal amount of units… and that German MMG would likely tear the Brits to bits. Even with those long lines of Polder hexes (5’ wide and deep water channels prevalent in that country), they would only offer a modicum of protection, so I went with a concentrated onboarding top left (Southwest edge).
As the British 2nd Royal Norfolks advanced, the German SS Defensive Fired… but apparently there was too much confusion as the Brits stormed in and there were no casualties inflicted. The British gained good ground and decent positioning.

What happens next was what was thought earlier… Close Combat! The British infiltration units stormed into the Germans’ positions in each of the houses and blew them away! The difference maker here was multiple British full squads going up against singular German SS half squads… they were simply overwhelmed and overrun. On the other hand, Advancing Fire (at 1/2 Firepower) yielded no punishment on the Germans so, the Germans are sure to let loose a hail of bullets on their forthcoming 1st turn!

As the Germans, in a face-to-face game, I can see this is a hard decision in setup!
26th May 1940, Le Cornet Malo, Belgium.
As the fighting for the village of Le Cornet Malo went back and forth, Capt. Hallett of "B company" took a patrol to the southern sector of the village. Here the patrol engaged the SS Totenkopf Division as they prepared to send reinforcements into the fighting.
I need to be vague on this Advanced Squad Leader Starter Kit scenario, as this is a playtesting session, but basically, we’re talking about WWII 1940, where the British have inserted a small infiltration unit in a German occupied Belgium village, with a larger patrol force moving in from outside the village. The objective is to reduce the Germans to two or less units (counters). Outright elimination and seizing the village is a long shot, as the British are engaging an SS Totenkopf Division firmly embedded in the Village.
What you see below is the entire available battlefield. Germans setup first, followed by the British infiltration unit, which both sides could be anywhere that village battlefield. I’m playing this solitaire so, I do as I usually do… what’s the best tactics for setup and in each turn. For initial German setup, thinking as that player, I kept in mind that I needed at least 2 unbroken, Good Order units by the end of the British 5th turn (Germans only get 4), hence one of the strongest German squads with a LMG, fortified with a Leader (a sergeant) at the bottom (East) if the map; that machinegun can actually reach the top of the battlefield, with LOS… so it’s my last-stand-sentry! The odd counter you see on it is a piece of counter sheet that is cut roughly to a counter size… it’s the remind me that those units are “Hidden in Place” (HIP). The HIP rule is one for artillery units, but in this scenario, an SSR allows Infantry to use that — though since I’m playing it solitaire, where you’d generally keep those units off the board unto they are revealed by being in LOS of an oncoming enemy units, or they move or fire, I’m just placing them on the board.
Since this is an offensive deal for the German SS, I set the rest of the division forces mid-battlefield in stone buildings, which is a bit nerve wracking having those forces so far forward, but there’s not a lot of cover to their rear line.
The British infiltration force are nestled in stone buildings right next to German units! That’s kinda terrifying, actually! Cam you say, “Close Combat is a coming!”?
,TURN 1 - British
The British infiltration force first used their Prep Fire Phase to do some damage to the adjacent Germans, but bullets just pinged off the stone buildings! Nada. The following Movement Phase found the rest of the 2nd Royal Norfolk’s units advance onto the battlefield. I chose to enter in the best areas that had LOS restrictions from the Germans, which were few and far between! I thought of entering on the right (North) side into the Grain fields, which are in season, but even with the LOS hinderances, combined with slower movement restrictions made it a slow slog and open to incoming Defensive Fire; with the German SS entrenched in stone buildings clustered on the opposite side of the map, the best that would have done would have been to try and flank a minimal amount of units… and that German MMG would likely tear the Brits to bits. Even with those long lines of Polder hexes (5’ wide and deep water channels prevalent in that country), they would only offer a modicum of protection, so I went with a concentrated onboarding top left (Southwest edge).
As the British 2nd Royal Norfolks advanced, the German SS Defensive Fired… but apparently there was too much confusion as the Brits stormed in and there were no casualties inflicted. The British gained good ground and decent positioning.
What happens next was what was thought earlier… Close Combat! The British infiltration units stormed into the Germans’ positions in each of the houses and blew them away! The difference maker here was multiple British full squads going up against singular German SS half squads… they were simply overwhelmed and overrun. On the other hand, Advancing Fire (at 1/2 Firepower) yielded no punishment on the Germans so, the Germans are sure to let loose a hail of bullets on their forthcoming 1st turn!
As the Germans, in a face-to-face game, I can see this is a hard decision in setup!